Discussion Forum - Northstar Chevelle Club

Members Login
Username 
 
Password 
    Remember Me  
Post Info TOPIC: Can I use these 12 bolt axels? Take a look at the photos


2K+ Club

Status: Offline
Posts: 2739
Date:
Can I use these 12 bolt axels? Take a look at the photos
Permalink  


I had planned to use these on my rebuild.  To me they look OK; but I thought I would check with some of you.  I only drive about 1000 miles a year and rarely exceed 60 mph; but it does happen. I took 4 photos of each axel, rotating them 90 *. I put the seals on to identify the two different axels.  I did run a little 1200 grit sand paper around, I think those marks are visible. 


-- Edited by jim larson on Tuesday 16th of February 2016 10:30:11 AM

Attachments
__________________

Jim L

Lake City


1K+ Club

Status: Offline
Posts: 1724
Date:
Permalink  
 

The one with the seal at the bottom I would reuse. The other with the seal at the top I would replace personally. But it would be usable if you have to.


__________________

Chris P
East Central, Mn

66 Chevelle 300 deluxe


2K+ Club

Status: Offline
Posts: 2739
Date:
Permalink  
 

Thanks Chris, looks like around $300 for a good pair.  I am on the fence.

On another note, I have been looking at the video from Toms differentials regarding the tuning of the posi.  After he gets though he mentions you need at least .008" clearance between the cross pin and the end of the axel.  But Is it ok to have more than .008?  I have .025 and .020 respectively.  I wonder if this is to much end play?


-- Edited by jim larson on Tuesday 16th of February 2016 12:14:22 PM

__________________

Jim L

Lake City


1K+ Club

Status: Offline
Posts: 1724
Date:
Permalink  
 

So is that value with new clutches or original clutches? If it is original clutches it would make me think they have a lot of wear in them. You can have more it just depends on how picky you want to be. I know Tom's sells C clips with different thicknesses to tighten that up.

I would think there are places you could get a single axle if desired. In fact you could try clutch and u joint in maple grove.


__________________

Chris P
East Central, Mn

66 Chevelle 300 deluxe


2K+ Club

Status: Offline
Posts: 2739
Date:
Permalink  
 

67ss wrote:

So is that value with new clutches or original clutches? If it is original clutches it would make me think they have a lot of wear in them. You can have more it just depends on how picky you want to be. I know Tom's sells C clips with different thicknesses to tighten that up.

I would think there are places you could get a single axle if desired. In fact you could try clutch and u joint in maple grove

I am not sure if the  clutches are original that are in  the posi now,  I have photo's of them to show the wear or lack of wear.  I am not sure of the posi shims, if they are original or not or what their thickness measures.  The gears show a wear pattern; but I don't think there is much wear.   I could take additional photos of the clutch. A friend suggested to add .010 to each side in the posi.  That would get me to .015 and .010  Here are some photo's; but the clutches are stacked, although I think they all look the same.  I will have to check the C clips for wear.


Attachments
__________________

Jim L

Lake City


1K+ Club

Status: Offline
Posts: 1724
Date:
Permalink  
 

My understanding of the clutches is you don't look at the wear of the crosshatching you look at the wear of the black film that is covering them. You can see in your pictures where there is no black and it is just shiny and how it varies depending on which clutch plate you are looking at. It looks to me that those clutches have quite a bit of wear on them. You could reuse them and add shims to tighten it all back up and it would work but may not hold super tight, then again you are not racing and doing burnouts either.


__________________

Chris P
East Central, Mn

66 Chevelle 300 deluxe


2K+ Club

Status: Offline
Posts: 2739
Date:
Permalink  
 

Thanks for all your help Chris.  Big Gear Head (Freddie Byers on TC said he thought they looked OK  to reuse).  I took the posi apart again, just now.  I has been apart at least once, since the thrust washers are not copper as I understand they were originally.  I had two shims on the passenger side for .035 and three on the drivers side  for .045. I though you were suppose to have the same on each side. Interesting that I had 0.25 clearance on the drivers side and .020 on the passenger between the cross shaft and the axel.

If I add .005 to each side I should be at .015 and .020 respectively. I think I will start with .045 shim  on each side and measure again. Then adding .005 more, so I have .050 on each side. I wonder what the thickness of the C clips is suppose to be?  Mine both measure .150; but they fit the axels with .004 and .007 of play.


-- Edited by jim larson on Tuesday 16th of February 2016 05:14:13 PM

__________________

Jim L

Lake City


Vice President

Status: Offline
Posts: 484
Date:
Permalink  
 

Jim

Shim each clutch pack to eliminate the clutch and gear clearance. If you have too many shims on one side, the spider gears won`t line up in the case and the cross shaft will bind
or it my not even go in. If needed, move shims from one side to the other. After you get zero clearance (or even a snug fit) with the clutchs/gears and the spider gears centered
in the housing, THAN you can check axle to C/shaft clearance.

Now with all that said I agree with Chris`s comment: "then again you are not racing and doing burnouts either." The diff will run just fine with a the clearances that you have.
I`m sure my diff has a lot more ware/clearance than what you are describing.

As for the axles, are they from your car or a different housing ?


__________________

Bob W.

Lino Lakes


2K+ Club

Status: Offline
Posts: 2739
Date:
Permalink  
 

Thanks Bob. This is a completely different axel than the axel that is presently in my car. I suppose I could pull those axels and put them in this housing if they look a lot better.

   I have decided to re-use the clutch pack.  And will be ordering some new shims today from Tom's Differential.  My goal is to try and get the posi a little tighter.  As I now have 3 shims for .045 and two shims for .035 I will start with a two shim to total .050 and a single shim of .040.  I hope this  goes together without two much difficulty, since it turns freely and goes together now without to much trouble. 

Then I will install the springs and cross pin.  I then plan to install the axels and C clips and hopefully I can measure the end play between the cross pin and the axel ends.  Hopefully this will tell me which side to add and subtract shim width. My C clips measure .150 and .149 respectively.  I have .006 and .004  clearance with C clips installed.  I wonder if you can order thicker C clips? I had estimated the total cost to be less then $300 for parts, paint, etc, since I had some gears already and planed to re-use the axels, gears, and posi.

Well I just had the axel housing checked to see if it was straight.  $163.47 from Zumbrota Bearing and Gear. Cost estimate has moved to $450.


__________________

Jim L

Lake City


Vice President

Status: Offline
Posts: 484
Date:
Permalink  
 

If you shim the clutch/gear assy. tight, and you have too many shims in one side, this will shift the sire and spider gears to the side. If you were able to force the cross pin in, that would load one set of clutches more than the other, my also ware the cross shaft/gears. So do not use axle to c/shaft clearance as a guide for adding or subtracting shims!

As long as you can slide the c/shaft in with on resistance after you have shimmed the clutches tight your good. The shim probably won`t be the same on each side, that ok.
When the gears are centered and c/shaft slides in freely, the clutches will be loaded equally.

Assemble the spring and reinstall the c/shaft, check slide gear to spider gear for clearance, should be no clearance, if there is you can run it, just be sure the are centered in the housing, otherwise add shin to the clutches to close down gear clearance.

Now you can check axle to c/shaft clearance. the "C" clip thickness is used to adjust axle end play, not to preload the clutches.

Hope this helps
Bob

__________________

Bob W.

Lino Lakes


2K+ Club

Status: Offline
Posts: 2739
Date:
Permalink  
 

Thanks again.  I was referring to the C clip thickness in regard to axel end play not  and not to determine which side to add/subtract shims to load the clutches.

I understand the cross shaft has to slide in freely  as to not load one side more than the other.  Cross shaft  slides in freely now with .045 and .035 now, so what you are saying is add equal amounts to each side, like the next step up should be to use .050 and .040 and then add or subtract equally unless the cross shaft does not slide in equally.  And as I am using my old clutch plates, who knows if they have worn equally.

I have heard that it is not uncommon that the carrier housing to be  machined so that the c/shaft is not center in the carrier.  And that you might experience  that the c/shaft is as much as .015 off center and thus the shims on one side might be as much as .015 more than the other side.  Right now I am at .045 and .035 on the other, so maybe my cross shaft is not centered.  Have you heard this?

Hopefully I can add .010 to each side and the c/shaft slips into place.  Then my axel end play will be about.012 and .010.  Heading to AZ shortly, and praying for warm weather when I return. confused
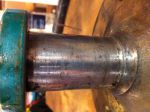
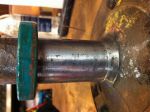
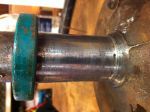
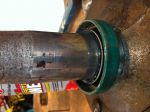
i  So I can drive the car and get to work on the VC issue.


__________________

Jim L

Lake City


Vice President

Status: Offline
Posts: 484
Date:
Permalink  


Your right on target. Sorry for the confusion.

I would think the clutches/gears would wear the same on both sides, don`t know that for sure.
I`m not surprised that the shimming is not the same, could also be the case is machined deeper on one end, or a side gear is thicker.

So shim it up tight, if the pin won`t slide free, it was set up incorrect before or, it the clutches wore more on on side then the other.

Here`s a thought, if you drove the car hard around a cloverleaf, would the right side clutches ware more. The left side axle would be against the cross shaft, not compressing the clutches, right axle would pull on the right side gear and compressing the clutches. Might have to do a lot of cloverleaf to to see any measurable ware.

Also axle end play should be reduced when clutch/gear clearance is eliminated, may not need thicker C clips.

Let us know how it work out

__________________

Bob W.

Lino Lakes


2K+ Club

Status: Offline
Posts: 2739
Date:
Permalink  
 

Packing for AZ this morning.  I will get back on the rear axel  when I get back.  Ordered shims and other parts from Tom's differential yesterday.  

I have a set of what I thought were ring gear bolts; but I don't like them.  They appear short, only 5/8" with a flanged head that is serrated with a 1/2" hex head.  I think the original were 13/16" long with a 9/16"  hex head and a lock washer. Any recommendations here.  I have been looking at Motive Gear, Yukon, and Ratech,  from online information they are all  7/8" long that may be a tag long even with a lock washer.


__________________

Jim L

Lake City


Vice President

Status: Offline
Posts: 484
Date:
Permalink  
 

I`ll check one of my 12 bolts, it`s on the floor,drained and cover is loose.

As a rule of thumb minimum thread engagement is equal to the diameter on the bolt, EI: 3/8 bot needs 3/8 thread engage, 1/2dia./1/2 engagement minimum there are exceptions however.

The serrated flanged bolt shouldn`t need a lock.
The thickness of a 9/16 lock is between 1/8" and 3/16" so the original and 5/8" from Tom`s have about the same T/engagement.

I`ll see what mine looks like.

__________________

Bob W.

Lino Lakes


2K+ Club

Status: Offline
Posts: 2739
Date:
Permalink  
 

The 5/8" did not come from Toms, it was left over from a Yukon kit (depth is actually 0.660).  Engagement measures  be about 0.280 with no washer because of the serrated flange.  I think this is not enough, it should be 0.375 according to your info. Depth of the threaded hole  in the ring gear seem to be about .50".  The arp bolts with a serrated head have a length of 0.800, a little more than 0.140 than my bolt.

Depth of the ring gear mounting hole in the case is 0.375, so the ARP bolt has a mounting depth of 0.425, whereas this bolt has a mounting depth of 0.280. The depth of the hole in the ring gear is about 0.500.

The lock washers I have only are about 0.090 in thickness. The AMK catalog shows fours sizes from 0.081 to 0.120 for lock washers, so the motive bolt at 0.875 less 0.375 less 0.090  should give you a engagement depth of 0.41.  I was worried that the bolts I have were to short and it appears they are to short.  I also though the others might be to long, but it looks like they will work.

Didn't want to order and have bolts shipped only to find they will not work.


Hopefully you have original bolts in the rear on the floor and can give me the exact measurements.


-- Edited by jim larson on Saturday 20th of February 2016 02:35:09 PM

__________________

Jim L

Lake City


Vice President

Status: Offline
Posts: 484
Date:
Permalink  
 

My diff has a #3 case with a 4.11 gear that should be bolted to a #4 case so there is a spacer between the ring gear and diff case, so it`s not stock . The case is stock, can`t tell about the r/gear.

So here are the numbers:

There is only .280" of threads, the threads in the r/g are recessed by .120", so the hole in the r/g is .400" deep. The spacer is .320", the diff case is .340", total Depth 1.060".
The bolt is 1.116" Long with a washer that is .096" that leaves 1.02 bolt length against the depth of 1.06' that leaves .040" unused threads in the gear. So the actual thread engagement is only .240".

Wow that ant much, I would have thought more than that!

Now if I was to remove the .320" spacer I would need a .644" max lenth that makes the 5/8 no washer bolt right on the money @.625" or 5/8' for my setup.
I don`t think the 5/8" bolt would be good with the .375" case also I would take advantage of the deeper bolt holes. How did you measure the bolt hole depth, yours came in at .500? I used a bolt to check depth, thread may not be as deep as the hole.
Different gear ratios might have thicker ring gear/deeper bolt holes.

The .240" thread worked on the street, someone swapped the original 3.31 for the 4.11 before i got it. It probably OK for the street, don`t think it would be good for 6000R dumps with stickies on the rear!!!


__________________

Bob W.

Lino Lakes


2K+ Club

Status: Offline
Posts: 2739
Date:
Permalink  
 

I measure the depth of the hole in the ring gear by taking a bolt, screwing it in, and subtracting the amount that did not go into the ring gear.  I measure the depth of the case holes by putting a bolt in the hole and measured the length that extended beyond the case.  I have a series 3 case so our case depth should be the same.  You got 0.340 and I got 0.375. sounds like you would be more accurate.

I remeasured the ring gear holes this morning.  I took a bolt and put washers and a nut on it so that 0.500 of the length was exposed.  I had about 1/2 a turn left after I put the bolt down and a .025 feeler gauge between the nut and the ring gear in all the holes.  So that would make the depth 0.475 if everything was accurate.  My threads also are recessed; but I would think about .075 at the most.  So that give me a possible 0.400 of thread; but bolt threads don't go all the way to the bottom of the hole in the ring gear, say .100, then maximum thread holding length would be .300. My ring gear is stock, it has the gm part # stamped into it along with the date.  I get .300 of threads in the ring gear and you got .280, sound pretty close.

I remeasured my case and I get .342 thick.  You got .340, so we are the same I would think you are correct.

So, lets take a .875 bolt, then subtract .100 (washer) subtract .340(case) that gives .435; a tab bit shorted than the .475 hole I got if I measured correctly (allowing for a miscue of .040).  A 13/16 bolt at .8125 would put the bolt in the hole at .3725 which I like better because I know it won't bottom out.,  but if the recess is .120 like yours would only give me .2525 of threads to hold.  Very close to your .2400 of engagement.

All this confuses me all the more. No ware can I find a bolt that is 13/16" but just maybe the 7/8" bolt will work. Is there a way to install the ring gear and be sure the bolt hasn't bottomed out?


__________________

Jim L

Lake City


Vice President

Status: Offline
Posts: 484
Date:
Permalink  
 

I like the way you checked the ring gear bolt hole, like we all did when we where kids and didn`t have any fancy measuring stuff.

Assemble the r/gear on to the housing (after you check the mating surfaces with a flat file) find a bolt with long enough threads, with a nut screwed on the bolt, run the bolt in all the way in the house and gear, than run the nut by hand, back out the bolt /nut together, that should give a very accurate max length.

I would go for as much tread engagement with out bottoming the bolt, .020"-.040" min. Don`t get to hung up on the statement I made about bolt length/diam. If you were bolting to mild steel, cast iron/aluminum you`d be asking for trouble with lesser thread engagement. This is one of those "exceptions", The ring gear is VERY VERY  hard.!!! The bolt is quite hard also. So if there`s enough thread to get proper torque/stretch this will give a very hi clamp load to the ring gear to case joint.


__________________

Bob W.

Lino Lakes

Page 1 of 1  sorted by
 
Quick Reply

Please log in to post quick replies.

Chatbox
Please log in to join the chat!