Discussion Forum - Northstar Chevelle Club

Members Login
Username 
 
Password 
    Remember Me  
Post Info TOPIC: Goodbye 283, hello 350


Webmaster

Status: Offline
Posts: 158
Date:
Goodbye 283, hello 350
Permalink  


Dad and I got the 283 and tranny pulled last night. Hopefully tonight the 350 will just "drop" right back into place. The block and headers are all painted up and looks pretty good. I have to say, without all the weight holding down the nose, it lifted the front up a lot. Gave it almost an old school drag car looking stance. While everyone is lowering their cars, I have to say, I kind of like the nose up stance. 

ry%3D400

Goodbye 283, hello 350


__________________

1965 Elky, 350-200R4

1970 Mercury Colony Park 

1952 Allis Chalmers WD

"It's not about how fast you go, it's about how fast you get going"

~ Steven ~ Stacy, MN


1K+ Club

Status: Offline
Posts: 1724
Date:
Permalink  
 

Should be laying down one wheel wonder strips all weekend.  thumbsup


__________________

Chris P
East Central, Mn

66 Chevelle 300 deluxe


President

Status: Offline
Posts: 7328
Date:
Permalink  
 

67ss wrote:

Should be laying down one wheel wonder strips all weekend.  thumbsup


 Better still, it should be on the road for Car Craft...nana


__________________

Mitch D.   River Falls, WI

Lifetime member of the "Cars apart Club"

1966 Chevelle SS 396 M20

1970 Chevelle SS 396 M20

1967 Camaro SS/RS 350 M20


1K+ Club

Status: Offline
Posts: 1724
Date:
Permalink  
 

That is what he was hoping when the plans were being drawn for upgrading the 350 before he dropped it in. Should have a wee bit more horsepower now to get him into some trouble.gearbanger


__________________

Chris P
East Central, Mn

66 Chevelle 300 deluxe


President

Status: Offline
Posts: 7328
Date:
Permalink  
 

67ss wrote:

That is what he was hoping when the plans were being drawn for upgrading the 350 before he dropped it in. Should have a wee bit more horsepower now to get him into some trouble.gearbanger


 Steven get in trouble ???  he's a sensible young man.

Well, at least he WAS when he only had 195 HP..laughing


__________________

Mitch D.   River Falls, WI

Lifetime member of the "Cars apart Club"

1966 Chevelle SS 396 M20

1970 Chevelle SS 396 M20

1967 Camaro SS/RS 350 M20


3K+ Club

Status: Offline
Posts: 4731
Date:
Permalink  
 

Let's just say that 350 is no longer the 'smogger' engine I sold him, and is MUCH healthier now.  thumbsup


__________________

Stan S.-Twin Cities 'South Metro'

1972 Malibu Convertible 2nd time around 

2001 Mustang GT Convertible 

Forum influenced terms: 'Link Paste', 'Stanitized', & 'Revolving garage door...' 


Webmaster

Status: Offline
Posts: 158
Date:
Permalink  
 

Alright so needless to say, it didn't just "drop" right back in. Like they ever would. First of all headers may look cool, but they really suck getting in and out! Luckily we realized when we pulled the 283 that they had to come with the engine, so when we put the 350 in, we slid them in with it, but it still was a pain in the a$$. We got the motor bolted up to the tranny and everything is in, except we are having some troubles getting the engine mounting bolts through. We are about half a hole off and cannot get the rubber to compress enough to get the bolt all the way through. Suggestions?


I'm excited about this engine! Dad has already given me the talk about staying out of trouble! He gave me the "talk" with the 283 when I first got the elky, but after I tried to squeal the tires, and a chirp came out, he didn't have much to worry about. However when Chris helped me put the engine together, we went for a ride in his '55 with a built 350 and that caught dad's attention real quick. I have to say there just aren't enough hours in a day to get everything done, but she will be done by Car Craft! That's for sure! 


__________________

1965 Elky, 350-200R4

1970 Mercury Colony Park 

1952 Allis Chalmers WD

"It's not about how fast you go, it's about how fast you get going"

~ Steven ~ Stacy, MN


3K+ Club

Status: Offline
Posts: 4731
Date:
Permalink  
 

Try these:

1.) Take a cold chisel punch or a large screw driver, insert it in the open portion of the motor mount hole and see if you can lever it down into place.

2.) While supporting the trans with a jack, get under the car and wiggle the tailshaft of the trans around while your Dad is on the topside, and wiggle it left to right and up and down and see if that moves the engine mounts down any.

3.) Getting more difficult now... lift the motor/trans back up enough to get the mounts off the engine and use a hammer to spread the ears of the mount a little wider (check them on the frame mounts also to make sure they aren't binding by themselves

4.) Worst case (and I think most of us have done this...) with the engine/trans as far down as you can get it, grab the Uni-Bit and open up the mount hole enough to get the bolt in (Only do this if at least half of the hole is visible)

It's amazing sometimes how things don't like to go back together after even a simple change like this!  rant2


__________________

Stan S.-Twin Cities 'South Metro'

1972 Malibu Convertible 2nd time around 

2001 Mustang GT Convertible 

Forum influenced terms: 'Link Paste', 'Stanitized', & 'Revolving garage door...' 


President

Status: Offline
Posts: 7328
Date:
Permalink  
 

cooz65 wrote:

Alright so needless to say, it didn't just "drop" right back in. Like they ever would. First of all headers may look cool, but they really suck getting in and out! Luckily we realized when we pulled the 283 that they had to come with the engine, so when we put the 350 in, we slid them in with it, but it still was a pain in the a$$. We got the motor bolted up to the tranny and everything is in, except we are having some troubles getting the engine mounting bolts through. We are about half a hole off and cannot get the rubber to compress enough to get the bolt all the way through. Suggestions?


I'm excited about this engine! Dad has already given me the talk about staying out of trouble! He gave me the "talk" with the 283 when I first got the elky, but after I tried to squeal the tires, and a chirp came out, he didn't have much to worry about. However when Chris helped me put the engine together, we went for a ride in his '55 with a built 350 and that caught dad's attention real quick. I have to say there just aren't enough hours in a day to get everything done, but she will be done by Car Craft! That's for sure! 


 If the mounts are new and the safety lock style, they are thicker and move the hole further up/away from the frame stand. Many of those mounts have a slot for the bolt hole to allow for this. As Stan suggested, you can slot the mount lower to get the bolt thru.

A pic is always good to "see" what you are dealing with.


__________________

Mitch D.   River Falls, WI

Lifetime member of the "Cars apart Club"

1966 Chevelle SS 396 M20

1970 Chevelle SS 396 M20

1967 Camaro SS/RS 350 M20


President

Status: Offline
Posts: 7328
Date:
Permalink  
 

It's Sunday night, is that 350 roaring yet...dunno


__________________

Mitch D.   River Falls, WI

Lifetime member of the "Cars apart Club"

1966 Chevelle SS 396 M20

1970 Chevelle SS 396 M20

1967 Camaro SS/RS 350 M20


Webmaster

Status: Offline
Posts: 158
Date:
Permalink  
 

Lost in the 60s wrote:

It's Sunday night, is that 350 roaring yet...dunno


 It has been a long weekend........For some reason, my mind says you can do one thing, and the car says ha, good lucky. Alright update, Everything is bolted down and ready to go except for a few minor details. The oil pan is hitting the cross-member on one side, just barely (probably why we had trouble getting the bolts through). Should I be overly concerned or should we lift it up a little and try to dent it? 

Next problem, is my thermostat housing. I need it to point to the passenger side instead of the driver side like most. I have a harrison radiator in there and the upper rad. house is on the passenger side. The intake on my 283 allowed for some interesting routing, but this edelbrock isn't allowing that. Anyone have any better options than this water neck? I've looked through everything and I can't find a stock neck that points to the passenger side. 

Waterneck 

ry%3D400

ry%3D400

Then the last and final "problem" I'm having is my TV cable. To get it to full throttle it takes a lot of pressure on that line. Is this normal, it just never seemed right on the 283. The little teeth on the cable aren't enough to hold it, so when I press down the pedal, it will pull the cable out, and not the line. I opened the teeth up a little bit and it seems to be holding now, but you have to put a lot of foot into it, to get the cable to pull out. Those who have 200r4's is yours like this? or does that bowtie cam kit help that. 

Thanks guys, I have 4 nights to be up and rolling again! 


__________________

1965 Elky, 350-200R4

1970 Mercury Colony Park 

1952 Allis Chalmers WD

"It's not about how fast you go, it's about how fast you get going"

~ Steven ~ Stacy, MN


3K+ Club

Status: Offline
Posts: 4731
Date:
Permalink  
 

Hang in there Steven, you're getting close!

I've used that exact same water neck, and it works fine.  I'm not sure if there is a 'stock' neck that turns towards the passenger side, but others with the 6X's will know more.

I would be careful on denting the oil pan, as you don't want to create any cracks in the metal or you will have oil leaks.  I hate to suggest this, but the 283 engine mounts might be different/lower than the 350 mounts if you re-used them, but I'm not sure.  Something to investigate.

On the TV cable, yes it's a hard/firm push with the foot to set it, but the carb bracket should hold and not slip.  I've not had the slippage problem with the Bowtie Overdrives TV Made EZ kit.


__________________

Stan S.-Twin Cities 'South Metro'

1972 Malibu Convertible 2nd time around 

2001 Mustang GT Convertible 

Forum influenced terms: 'Link Paste', 'Stanitized', & 'Revolving garage door...' 


Secretary

Status: Offline
Posts: 2941
Date:
Permalink  
 

I can't see pics at work, but I can check to see if I have a t-stat housing that might work. I have a couple extras that have different mountings from when I had to fit under my throttle body.

__________________

Bryan-NW 'burbs
1972 Malibu
Vaguely stock appearing, and the opposite of restored.
1999 std bore 5.7, Vortec heads, Holley Stealth Ram, GM cam
700R4, Viking coilovers, 12 bolt 4.10 posi, and a whole bunch more


President

Status: Offline
Posts: 7328
Date:
Permalink  
 

Some 6 cylinders have a t-stat housing that points to the right. Was that originally a 6 cylinder car/radiator ?? The neck will work as long as the drop isn't too severe to meet the 90° neck. A 45° neck may be a better alignment to the rad, if you can find one.

The frame stands are most likely shorter. GM changed the frame stands in '67 when they came out with the 350 for more pan clearance. You may want to look into getting different stands, but for now, you should be OK. A SLIGHT bow of the pan will be alright for clearance for now. I would do that opposed to leaving the pan vibrating/moving on the crossmember and maybe wearing a hole in it.

__________________

Mitch D.   River Falls, WI

Lifetime member of the "Cars apart Club"

1966 Chevelle SS 396 M20

1970 Chevelle SS 396 M20

1967 Camaro SS/RS 350 M20


Webmaster

Status: Offline
Posts: 158
Date:
Permalink  
 

Lost in the 60s wrote:

Some 6 cylinders have a t-stat housing that points to the right. Was that originally a 6 cylinder car/radiator ?? The neck will work as long as the drop isn't too severe to meet the 90° neck. A 45° neck may be a better alignment to the rad, if you can find one.

The frame stands are most likely shorter. GM changed the frame stands in '67 when they came out with the 350 for more pan clearance. You may want to look into getting different stands, but for now, you should be OK. A SLIGHT bow of the pan will be alright for clearance for now. I would do that opposed to leaving the pan vibrating/moving on the crossmember and maybe wearing a hole in it.


 Mitch, thanks for the heads up on the frame stands. I did some quick searching and I'm not the first one to have this problem. My pan is just barely hitting on the passenger side. Some guys have mentioned putting in some washers, or have made a spacer to fit between the block and motor mounts to raise it up just a touch. Raise it just a touch and a SLIGHT bow of the pan to clear? Seeing as how my housing won't be here till tomorrow anyways, the ol' girl isn't moving anywhere tonight so I might as well get some other things done. 


__________________

1965 Elky, 350-200R4

1970 Mercury Colony Park 

1952 Allis Chalmers WD

"It's not about how fast you go, it's about how fast you get going"

~ Steven ~ Stacy, MN


President

Status: Offline
Posts: 7328
Date:
Permalink  
 

cooz65 wrote:
Lost in the 60s wrote:

Some 6 cylinders have a t-stat housing that points to the right. Was that originally a 6 cylinder car/radiator ?? The neck will work as long as the drop isn't too severe to meet the 90° neck. A 45° neck may be a better alignment to the rad, if you can find one.

The frame stands are most likely shorter. GM changed the frame stands in '67 when they came out with the 350 for more pan clearance. You may want to look into getting different stands, but for now, you should be OK. A SLIGHT bow of the pan will be alright for clearance for now. I would do that opposed to leaving the pan vibrating/moving on the crossmember and maybe wearing a hole in it.


 Mitch, thanks for the heads up on the frame stands. I did some quick searching and I'm not the first one to have this problem. My pan is just barely hitting on the passenger side. Some guys have mentioned putting in some washers, or have made a spacer to fit between the block and motor mounts to raise it up just a touch. Raise it just a touch and a SLIGHT bow of the pan to clear? Seeing as how my housing won't be here till tomorrow anyways, the ol' girl isn't moving anywhere tonight so I might as well get some other things done. 


 A couple heavy washers between the block and mounts should be enough to lift it off the frame. Don't space the other side up, or it will rock back over onto the frame.


__________________

Mitch D.   River Falls, WI

Lifetime member of the "Cars apart Club"

1966 Chevelle SS 396 M20

1970 Chevelle SS 396 M20

1967 Camaro SS/RS 350 M20


Secretary

Status: Offline
Posts: 2941
Date:
Permalink  
 

Saw the link now, I use the same waterneck on mine currently and have had no leak issues.

__________________

Bryan-NW 'burbs
1972 Malibu
Vaguely stock appearing, and the opposite of restored.
1999 std bore 5.7, Vortec heads, Holley Stealth Ram, GM cam
700R4, Viking coilovers, 12 bolt 4.10 posi, and a whole bunch more


Webmaster

Status: Offline
Posts: 158
Date:
Permalink  
 

Put about a quarter inch spacer on the passenger side mount. Didn't really change much. I did slide in a very THIN piece of rubber between the pan and crossmember. There is really no way of getting the hammer up into the space. How concerning is this? Trust me, I don't really have much desire to pull the thing out just to make some clearance.

__________________

1965 Elky, 350-200R4

1970 Mercury Colony Park 

1952 Allis Chalmers WD

"It's not about how fast you go, it's about how fast you get going"

~ Steven ~ Stacy, MN


2K+ Club

Status: Offline
Posts: 2791
Date:
Permalink  
 

Can you drive a couple of tapered wood shims (like you use to frame in windows/doors) into the space? They would "massage" the pan without risk of tearing or cutting it, and if you can't get them back out no big deal... vibration & decay they'd break up and fall out.

OR

Along the same lines, undo that sides motor mount through-bolt, lift/jack the engine up a bit, put something in there and DROP the engine back down. Raise it up again, repeat, check. You're just looking for about 1/8" or so.

__________________


John D. - St. Louis Park, MN.

1965 El Camino - LT-1, 4L60e, 4wh discs, SC&C susp.
2013 F-150 Platinum - Twin Turbo 3.5

2018 Factory Five MkIV Roadster build thread


Member

Status: Offline
Posts: 90
Date:
Permalink  
 

Did you use a aftermarket oil pan?


__________________


Webmaster

Status: Offline
Posts: 158
Date:
Permalink  
 

Oil pan is the factory one. Well there is good news, bad news, and worse news. First the good! Got her started last night, listened to the rumble, let the header paint heat up and cure, and went out for a cruise. Now the bad news, I only got to drive about a mile and we were overheating. I had put my working thermostat from the 283 and it appears to no longer be working. Alright fine, pulled Stan's, put it in a pot of water on the stove, just to check, and of course it worked. Great! put it in, filled her back up and went to go for a drive. Now at this time, it was dark, I pulled the lights, and no taillights/ brake lights. Wahoo! My favorite game, which wire is bad today! In my mind its the worst news. I love mechanical, but electrical crap can just be so frustrating. I didn't even get to press on the loud pedal last night! TWO more nights...........

__________________

1965 Elky, 350-200R4

1970 Mercury Colony Park 

1952 Allis Chalmers WD

"It's not about how fast you go, it's about how fast you get going"

~ Steven ~ Stacy, MN


President

Status: Offline
Posts: 7328
Date:
Permalink  
 

If neither the tail lights or brake lights work, check the connectors under the hood at the fuse block. They may have been disturbed during the engine thrash. Those are 2 different circuits and point to a connector issue, rather than a single wire. Also check the fuses. Start with the easy stuff.

__________________

Mitch D.   River Falls, WI

Lifetime member of the "Cars apart Club"

1966 Chevelle SS 396 M20

1970 Chevelle SS 396 M20

1967 Camaro SS/RS 350 M20


Secretary

Status: Offline
Posts: 2941
Date:
Permalink  
 

keep plugging away. Honestly, if you can get to the fairgrounds, there's enough people that can help probably. Several times members have been in a jam at things and group collaboration has solved their problems. A couple years ago Derek drove up from near Iowa and made it to just outside the gates before his Alternator died. A tow strap got him in and to our space. A couple calls found one and someone to get it to the gate. I knew a tire guy there who had an impact and socket to swap the pulley over, and he was back in business.

I was also saved when my throttle cable end pulled through the pedal while out at Rock Falls. After a push back off the line, and then after "fixing" it, a idle speed trip down the track (I crossed the beams and they wouldn't come get me or let me push back) John D came up with a wire nut with a cut off tip and then squished to keep it from pulling through. I still run it like that to this day.


__________________

Bryan-NW 'burbs
1972 Malibu
Vaguely stock appearing, and the opposite of restored.
1999 std bore 5.7, Vortec heads, Holley Stealth Ram, GM cam
700R4, Viking coilovers, 12 bolt 4.10 posi, and a whole bunch more


1K+ Club

Status: Offline
Posts: 1724
Date:
Permalink  
 

Remember what I mentioned about sometimes needing the bypass hose off the intake to make the thermostat open.


__________________

Chris P
East Central, Mn

66 Chevelle 300 deluxe


Mega Poster

Status: Offline
Posts: 713
Date:
Permalink  
 

Try drilling a 1/8" hole in the thermostat. You may have an air pocket underneath it.

__________________

John E - Rogers, MN

Instructions? All I need is the exploded view.
70 El Camino soon to be ls1/t56
64 Malibu SS


Webmaster

Status: Offline
Posts: 158
Date:
Permalink  
 

Chris, when you were talking about that, I thought it was for if it was overheating in general, but its to make the thermostat open? Haven't tried Stan's t-stat yet, but if still having problem's, I would cut one of the heater-core lines, put a T fitting in it, and run a line from the T to that intake port?

Mitch, I've had problems with the taillights before. Everytime I've tried to diagnose it, it seems like I would unplug a connector, put some die-electric grease on it, and plug it back in and she would work again. So hopefully its just a connector issue.

__________________

1965 Elky, 350-200R4

1970 Mercury Colony Park 

1952 Allis Chalmers WD

"It's not about how fast you go, it's about how fast you get going"

~ Steven ~ Stacy, MN


Secretary

Status: Offline
Posts: 2941
Date:
Permalink  
 

https://i168.photobucket.com/albums/u165/Bowtie-Bry/carpics/DSC03242.jpg 


this is a pic of how mine was, it's my actual pic. We have a blocker program at work, so I can't see it, but this is the pic address. I found it on google searching the words: Vortec bypass hose


__________________

Bryan-NW 'burbs
1972 Malibu
Vaguely stock appearing, and the opposite of restored.
1999 std bore 5.7, Vortec heads, Holley Stealth Ram, GM cam
700R4, Viking coilovers, 12 bolt 4.10 posi, and a whole bunch more


1K+ Club

Status: Offline
Posts: 1724
Date:
Permalink  
 

Yep it overheats because the thermostat won't open. You should be able to get a heater hose T fitting with a 3/8 nipple and also a barbed fitting to go into your intake just below the thermostat. Run a 3/8 hose from those two and thermostat should now open.


__________________

Chris P
East Central, Mn

66 Chevelle 300 deluxe


Webmaster

Status: Offline
Posts: 158
Date:
Permalink  
 

Alright, now out of curiosity, why does this fix the problem? If the water temp is hot, it opens up / why is this necessary on vortec heads, but not your everyday run of the mill SBC? Alright, now 4 just needs to hurry up so I can get out of this work place

__________________

1965 Elky, 350-200R4

1970 Mercury Colony Park 

1952 Allis Chalmers WD

"It's not about how fast you go, it's about how fast you get going"

~ Steven ~ Stacy, MN


Mega Poster

Status: Offline
Posts: 713
Date:
Permalink  
 

If an air pocket is in the intake manifold, this preventing the coolant from contacting thermostat. Hang the thermostat above boiling water and see how long it would take to open.


__________________

John E - Rogers, MN

Instructions? All I need is the exploded view.
70 El Camino soon to be ls1/t56
64 Malibu SS


1K+ Club

Status: Offline
Posts: 1724
Date:
Permalink  
 

What I have been able to figure out is the vortec motors have a bypass that comes off the water pump back to the motor using a rubber hose, early small blocks have a bypass through the water pump into the engine block through the headgasket and head and back to the intake. The bypass hole is not drilled on the vortec heads. So what John said is correct the hot water is not really getting to the bottom of the stat for it to open correctly. That is why the fitting on the intake is just below the t- stat to push water past it and get it to open up.


__________________

Chris P
East Central, Mn

66 Chevelle 300 deluxe


Webmaster

Status: Offline
Posts: 158
Date:
Permalink  
 

Thanks guys, Bowtie, your search key words were great. tiphat 
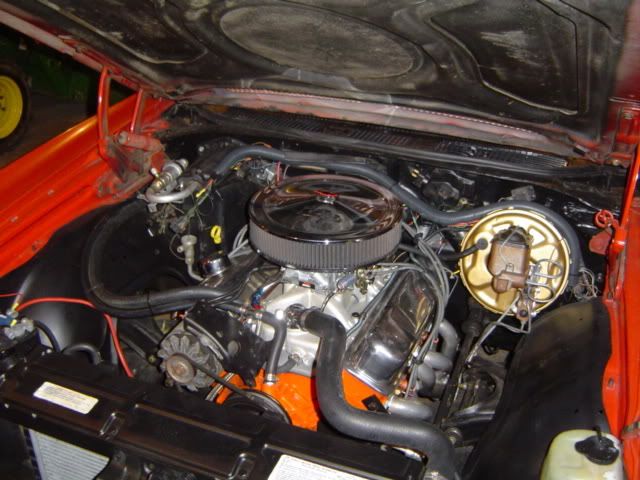
I have an inlet on my water pump that I currently have plugged off, looks like I can run directly from the intake to water pump without having to split the heater line. Chris your explanation as to why was dead on from what I can read. More updates to come tonight! Sidenote, Stan's T-stat is a 180 and I had read that is the right temp for older 350's. Were all sbc that temp or just the 350's?


Dad had the day off today, I had told him if he was bored to start testing connections and wires.....One can only hope.....help


__________________

1965 Elky, 350-200R4

1970 Mercury Colony Park 

1952 Allis Chalmers WD

"It's not about how fast you go, it's about how fast you get going"

~ Steven ~ Stacy, MN


1K+ Club

Status: Offline
Posts: 1724
Date:
Permalink  
 

If you need help with the lights let me know, maybe you can sneak up in the daylight and we can get them working. I can also take a look at your transmission cable adjustment.


__________________

Chris P
East Central, Mn

66 Chevelle 300 deluxe


President

Status: Offline
Posts: 7328
Date:
Permalink  
 

cooz65 wrote:


 Mitch, I've had problems with the taillights before. Everytime I've tried to diagnose it, it seems like I would unplug a connector, put some die-electric grease on it, and plug it back in and she would work again. So hopefully its just a connector issue.


 Kinda figured it was a corroded, loose connector. They get temperamental when they get that old. A whole new harness may be in the future.

As for stat temp 195° is the general stat for all sbc cars. The 180 will open sooner and may help keep the temp down in stop and go traffic, but it still depends on your fan system and radiator as to how efficient the cooling will be.


__________________

Mitch D.   River Falls, WI

Lifetime member of the "Cars apart Club"

1966 Chevelle SS 396 M20

1970 Chevelle SS 396 M20

1967 Camaro SS/RS 350 M20


2K+ Club

Status: Offline
Posts: 2791
Date:
Permalink  
 

If it's your tail & brake lights my 1st, 2nd, and 3rd guess's would be:

1 - Check where the flat ribbon cable going under the carpet/aft plugs into the connector at/near the fusebox. (mine has a broken lock tab and occasionally wiggles loose)
2 - Check where the same ribbon cable transitions to the lighting harness, inside the driver's side rear bed access panel (just behind the lamp assembly).
3 - Examine the condition of the ribbon cable under the carpet. It goes from the fusebox area, through the footwell, into the base of the "B" pillar, and inside the 1/4 panel to the driver's lamp assembly. (Mine had a screw ran through it, and it corroded)

I'll bring my meter and some "stuff" to the event - you bring some tools to unscrew stuff. If you can get it there, I'll fix your electrical gremlins Imgonna.

Nordeast is the preferred currency tiphat


-- Edited by John D on Wednesday 16th of July 2014 04:48:06 PM

Attachments
__________________


John D. - St. Louis Park, MN.

1965 El Camino - LT-1, 4L60e, 4wh discs, SC&C susp.
2013 F-150 Platinum - Twin Turbo 3.5

2018 Factory Five MkIV Roadster build thread


2K+ Club

Status: Offline
Posts: 2745
Date:
Permalink  
 

That ribbon cable is a problem on 64-67 cars when they get to this age. I recommend going directly to the connection under the dash, if thats where it is on 65 and using a properly grounded test light, check your lights there first.


__________________

Chris - Ramsey, MN.

Dear Optimist, Pessimist, and Realist.

While you guys were busy arguing about the glass of water. I drank it!

Sincerly,

The opportunist.


Webmaster

Status: Offline
Posts: 158
Date:
Permalink  
 

So the taillights ended up being a blown fuse.....but why did the fuse blow in the fist place.......the ribbon looks good

She runs and doesn't overheat!! The bypass hose fixed it. beers 

Took her out for a test drive, never got above 195, even while just sitting in the driveway idling. The only problem thus far, is she won't hold third gear. She takes off good, but wants to hit 4th too soon under heavy acceleration. She doesn't give third a chance. I didn't try it under normal acceleration as it was a short trip up to the fuel pump and back and for some reason the pedal seemed to be stuck to the floor board.....gearbanger ha so far I'm liking it! I'm assuming this has to do with the TV cable. Before when I had it on the 283, it would shift into 4th real early, now it seems to shift more reasonable, close to 35/40, if just putzing down the neighboor hood, but now no third under acceleration. 


__________________

1965 Elky, 350-200R4

1970 Mercury Colony Park 

1952 Allis Chalmers WD

"It's not about how fast you go, it's about how fast you get going"

~ Steven ~ Stacy, MN


3K+ Club

Status: Offline
Posts: 4731
Date:
Permalink  
 

Steven, do you have any of the lockup electronics hooked up?  It almost sounds like it is going into 4th gear OD and locking up so that it won't upshift into 3rd gear?  Not sure how you had it set up with the 283.

Otherwise, the TV cable adjustment will have a big impact on how and when the trans shifts and upshifts.  With the Bowtie OD kit, only 1/8" adj. at the adjuster makes a big difference in firmness and timing. 


__________________

Stan S.-Twin Cities 'South Metro'

1972 Malibu Convertible 2nd time around 

2001 Mustang GT Convertible 

Forum influenced terms: 'Link Paste', 'Stanitized', & 'Revolving garage door...' 


Webmaster

Status: Offline
Posts: 158
Date:
Permalink  
 

Ya, I have a toggle switch hooked up for the lockup torque converter. Even with that turned off, so its not locking up, it's still going into fourth. When I installed the 200r4, I had talked with John? at Master Transmission? (that's where you all recommend right?) and he had told me that at WOT to bottom out the plunger/TV cable. So I set it up the same way I did on the 283. So I must be just a touch off on the adjustment.

__________________

1965 Elky, 350-200R4

1970 Mercury Colony Park 

1952 Allis Chalmers WD

"It's not about how fast you go, it's about how fast you get going"

~ Steven ~ Stacy, MN


Secretary

Status: Offline
Posts: 2941
Date:
Permalink  
 

I'm glad everything is falling into place for you, we'll see you at CC so we can check it out!

__________________

Bryan-NW 'burbs
1972 Malibu
Vaguely stock appearing, and the opposite of restored.
1999 std bore 5.7, Vortec heads, Holley Stealth Ram, GM cam
700R4, Viking coilovers, 12 bolt 4.10 posi, and a whole bunch more


President

Status: Offline
Posts: 7328
Date:
Permalink  
 

cooz65 wrote:

Ya, I have a toggle switch hooked up for the lockup torque converter. Even with that turned off, so its not locking up, it's still going into fourth. When I installed the 200r4, I had talked with John? at Master Transmission? (that's where you all recommend right?) and he had told me that at WOT to bottom out the plunger/TV cable. So I set it up the same way I did on the 283. So I must be just a touch off on the adjustment.


 I had the same issue with the 200 John built for me. I had him put a stronger spring in the governor to get the shift points higher. It is a tad high now but I can get it to upshift by lifting the pedal slightly. It's better than having it shift at 3500rpm at WOT.


__________________

Mitch D.   River Falls, WI

Lifetime member of the "Cars apart Club"

1966 Chevelle SS 396 M20

1970 Chevelle SS 396 M20

1967 Camaro SS/RS 350 M20


3K+ Club

Status: Offline
Posts: 4731
Date:
Permalink  
 

Lost in the 60s wrote:
cooz65 wrote:

Ya, I have a toggle switch hooked up for the lockup torque converter. Even with that turned off, so its not locking up, it's still going into fourth. When I installed the 200r4, I had talked with John? at Master Transmission? (that's where you all recommend right?) and he had told me that at WOT to bottom out the plunger/TV cable. So I set it up the same way I did on the 283. So I must be just a touch off on the adjustment.


 I had the same issue with the 200 John built for me. I had him put a stronger spring in the governor to get the shift points higher. It is a tad high now but I can get it to upshift by lifting the pedal slightly. It's better than having it shift at 3500rpm at WOT.


fyi-The Bowtie Overdrives TV Cable made EZ kit includes the stronger spring Mitch refers to.


__________________

Stan S.-Twin Cities 'South Metro'

1972 Malibu Convertible 2nd time around 

2001 Mustang GT Convertible 

Forum influenced terms: 'Link Paste', 'Stanitized', & 'Revolving garage door...' 


President

Status: Offline
Posts: 7328
Date:
Permalink  
 

SShink wrote:
Lost in the 60s wrote:
cooz65 wrote:

Ya, I have a toggle switch hooked up for the lockup torque converter. Even with that turned off, so its not locking up, it's still going into fourth. When I installed the 200r4, I had talked with John? at Master Transmission? (that's where you all recommend right?) and he had told me that at WOT to bottom out the plunger/TV cable. So I set it up the same way I did on the 283. So I must be just a touch off on the adjustment.


 I had the same issue with the 200 John built for me. I had him put a stronger spring in the governor to get the shift points higher. It is a tad high now but I can get it to upshift by lifting the pedal slightly. It's better than having it shift at 3500rpm at WOT.


fyi-The Bowtie Overdrives TV Cable made EZ kit includes the stronger spring Mitch refers to.


 Hmmmm......I don't think that's the same spring. The one in the kit goes on the end of the cable in the trans. The governor is in the valve body and necessitates removal of the pan and governor.


__________________

Mitch D.   River Falls, WI

Lifetime member of the "Cars apart Club"

1966 Chevelle SS 396 M20

1970 Chevelle SS 396 M20

1967 Camaro SS/RS 350 M20


Webmaster

Status: Offline
Posts: 158
Date:
Permalink  
 

UPDATE: An edelbrock 600 has been very fun so far! With the proper geometry things seem to be working much better. I think I might be a tooth or two off still but the shift points are much much closer than they were before. Put's a smile on my face and last night I think mom just about pooped her pants.

Now for the bad. I have no taillights again......Was out in town, stopped at wally world and came out only to realize I have no taillights. I guess it pays to have a brother-in-law be a cop in your hometown since I was able to get him to follow me home to protect my baby. I guess its time to start going through tomorrow and figure out just what the heck is going on. Since CarCraft, it hadn't blown a fuse, but I guess tonight was the night. Blinkers work, but no brake or taillights....

__________________

1965 Elky, 350-200R4

1970 Mercury Colony Park 

1952 Allis Chalmers WD

"It's not about how fast you go, it's about how fast you get going"

~ Steven ~ Stacy, MN


President

Status: Offline
Posts: 7328
Date:
Permalink  
 

Brake lights and taillights are 2 separate circuits and fuses. The signals work thru the same circuit and I believe the same fuse as the brake lights so there is a strange issue going on here. Maybe the signal switch in the column.

__________________

Mitch D.   River Falls, WI

Lifetime member of the "Cars apart Club"

1966 Chevelle SS 396 M20

1970 Chevelle SS 396 M20

1967 Camaro SS/RS 350 M20


2K+ Club

Status: Offline
Posts: 2791
Date:
Permalink  
 

Taillights don't go through the signal switch, they're a direct feed.

I'm seriously thinking you have a grounding issue, probably with your rear lamp housings on the 1/4's.

- Remove the 2 screws from each lens, and carefully remove them (if the diffusers are still in there be careful, they'll fall out)
- Remove the 4) 1/4-20 bolts holding the chrome bezels in the fenders, and remove the housings.
- Run a 1/4-20 tap through the mounting holes, and sand off the rust where the bezels touch the weld-nuts you just tapped.
- Put a smear of die-electric grease or vaseline on the bare metal you just created.
- Reassemble ** but trap a 1/4" star lockwasher ** on one hole (each side) between the bezel and body. (this will bite into the metal and give conductivity)
- See what your get.

Doing this will at least now eliminate the possibility of flakey grounds on your rear signal lamps, and it will only take about an hour.

__________________


John D. - St. Louis Park, MN.

1965 El Camino - LT-1, 4L60e, 4wh discs, SC&C susp.
2013 F-150 Platinum - Twin Turbo 3.5

2018 Factory Five MkIV Roadster build thread

Page 1 of 1  sorted by
 
Quick Reply

Please log in to post quick replies.

Chatbox
Please log in to join the chat!