Discussion Forum - Northstar Chevelle Club
| Post Info | TOPIC: 2012-2013 A Body Winter............and into Spring Project | ||||||||||
|---|---|---|---|---|---|---|---|---|---|---|---|
|
2K+ Club

|
|
||||||||||
|
Super Poster

|
|
||||||||||
|
2K+ Club
|
|
||||||||||
|
2K+ Club
|
|
||||||||||
|
Mega Poster

|
|
||||||||||
|
2K+ Club
|
|
||||||||||
|
2K+ Club
|
|
||||||||||
|
Mega Poster
|
|
||||||||||
|
2K+ Club
|
|
||||||||||
|
2K+ Club
|
|
||||||||||
|
3K+ Club
|
|
||||||||||
|
1K+ Club
|
|
||||||||||
|
2K+ Club
|
|
||||||||||
|
Secretary
|
|
||||||||||
|
2K+ Club
|
|
||||||||||
|
Super Poster
|
|
||||||||||
|
2K+ Club
|
|
||||||||||
|
2K+ Club
|
|
||||||||||
|
1K+ Club
|
|
||||||||||
|
2K+ Club
|
|
||||||||||
|
Mega Poster

|
|
||||||||||
|
2K+ Club
|
|
||||||||||
|
2K+ Club
|
|
||||||||||
|
1K+ Club
|
|
||||||||||
|
2K+ Club
|
|
||||||||||
|
President
|
|
||||||||||
|
2K+ Club
|
|
||||||||||
|
2K+ Club
|
|
||||||||||
|
President
|
|
||||||||||
|
Mega Poster
|
|
||||||||||
|
2K+ Club
|
|
||||||||||
|
President
|
|
||||||||||
|
3K+ Club
|
|
||||||||||
|
2K+ Club
|
|
||||||||||
|
Super Poster
|
|
||||||||||
|
2K+ Club
|
|
||||||||||
|
2K+ Club
|
|
||||||||||
|
2K+ Club
|
|
||||||||||
|
1K+ Club
|
|
||||||||||
|
President
|
|
||||||||||
|
Super Poster
|
|
||||||||||
|
2K+ Club
|
|
||||||||||
|
Super Poster
|
|
||||||||||
|
President
|
|
||||||||||
|
2K+ Club
|
|
||||||||||
|
Mega Poster
|
|
||||||||||
|
2K+ Club
|
|
||||||||||
|
President
|
|
||||||||||
|
2K+ Club
|
|
||||||||||
|
Mega Poster
|
|
||||||||||
|
|||||||||||
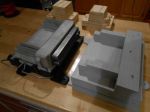
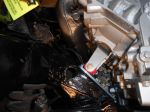
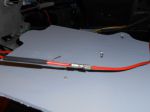
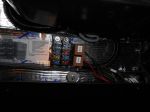
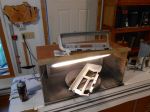
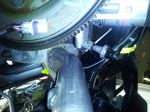
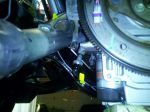
 . Those are really tall mounts, hood clearance still OK?


 )
)


|
|
||
| Chatbox | |
|---|---|
|
Please log in to join the chat!
|
|