Discussion Forum - Northstar Chevelle Club

Members Login
Username 
 
Password 
    Remember Me  
Post Info TOPIC: 2012-2013 A Body Winter............and into Spring Project


2K+ Club

Status: Offline
Posts: 2444
Date:
RE: 2012-2013 A Body Winter............and into Spring Project
Permalink  


We did discuss engine install as well as the rest of the project. Jason gave me the option of leaving the front clip off until I have the engine installed then taking it back to Maaco for the front clip installation. It was tempting and for some time that’s what I was going to do, I changed my mind at the last minute.

I may regret doing it this way but I do have a lot of wiring, heater, AC hoses, relays and other mod related fabrication that will need to be done. I felt it would be better to have the front clip on to do all that.


__________________

Kevin

Northwestern Ohio


2K+ Club

Status: Offline
Posts: 2444
Date:
Permalink  
 

Not much to see but it’s getting really close now; buff and polish time then trunk paint and it’s out of there; but I need to pay the bill first.


Attachments
__________________

Kevin

Northwestern Ohio


President

Status: Offline
Posts: 7328
Date:
Permalink  
 

It looks GREAT Kevin, but WHY did they put the side trim on and have to work around that before the final buff ???????

She's a trailer queen in the making....nana


__________________

Mitch D.   River Falls, WI

Lifetime member of the "Cars apart Club"

1966 Chevelle SS 396 M20

1970 Chevelle SS 396 M20

1967 Camaro SS/RS 350 M20


2K+ Club

Status: Offline
Posts: 2745
Date:
Permalink  
 

Any ideas on where your going to bring it for the convertible top or is top not needing to be replaced?


__________________

Chris - Ramsey, MN.

Dear Optimist, Pessimist, and Realist.

While you guys were busy arguing about the glass of water. I drank it!

Sincerly,

The opportunist.


2K+ Club

Status: Offline
Posts: 2444
Date:
Permalink  
 

Lost in the 60s wrote:

It looks GREAT Kevin, but WHY did they put the side trim on and have to work around that before the final buff ???????

She's a trailer queen in the making....nana


Mitch, that’s a good question, they did the same thing last year with the El Camino. First they cut and buffed the areas were chrome/emblems go then installed the chrome/emblems and cut and buffed the rest.

I was surprised to see tape over the chrome, the only thing I can think is they know I spent a lot of time on the chrome. I was in and out of there quickly today; I wanted to be at Derek’s by 1630 to pick up the El Camino; I’ll ask the question the next time I‘m there.

No Trailer Queen here, this ones going on the hi-way.


__________________

Kevin

Northwestern Ohio


2K+ Club

Status: Offline
Posts: 2444
Date:
Permalink  
 

Chris R wrote:

Any ideas on where your going to bring it for the convertible top or is top not needing to be replaced?


 Chris, the top could be down the road a bit, there are some club members that have been pleased with a couple of different shops, one in the NW and the other in the SW metro. But like Jon H said, you drive it with the top down all summer anyway.

Any recommendations?


__________________

Kevin

Northwestern Ohio


2K+ Club

Status: Offline
Posts: 2444
Date:
Permalink  
 

The Buick returned home today, it arrived today after riding on a flatbed truck in a driving rainstorm for 8 miles, the transport ride actually turned out to be beneficial, nothing better than wiping down and drying off a car to get to know the paint and every inch of the sheet metal; second positive discovery, its watertight.

Hopefully I’ll get some better pictures outside tomorrow. Now the work continues.


Attachments
__________________

Kevin

Northwestern Ohio


Super Poster

Status: Offline
Posts: 596
Date:
Permalink  
 

Looks good, worth the wait thumbsup


__________________

Steve S. - Fountain, MN


1972 Chevelle - 383 stroked LS1/4L60E - SOLD!


President

Status: Offline
Posts: 7328
Date:
Permalink  
 

dashboard wrote:

So much for taking pictures outside this morning; it’s also not the morning to be taking everything out of the garage to rearrange and make room for the new arrival.
Stan’s happy now, he moves to the front of the line, he’s next.gearbanger


 It isn't a morning for anything outside..dammit   
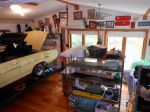
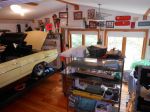
The Stillwater Art fair and Camaro Club season opening cruise are today too and with this weather, we will stay parked inside.

Guess I can go in the shop and start getting the Pete ready to sell...boring


-- Edited by Lost in the 60s on Saturday 18th of May 2013 08:35:15 AM

__________________

Mitch D.   River Falls, WI

Lifetime member of the "Cars apart Club"

1966 Chevelle SS 396 M20

1970 Chevelle SS 396 M20

1967 Camaro SS/RS 350 M20


2K+ Club

Status: Offline
Posts: 2444
Date:
Permalink  
 

So much for taking pictures outside this morning; it’s also not the morning to be taking everything out of the garage to rearrange and make room for the new arrival.
Stan’s happy now, he moves to the front of the line, he’s next.gearbanger


__________________

Kevin

Northwestern Ohio


3K+ Club

Status: Offline
Posts: 4731
Date:
Permalink  
 

dashboard wrote:

So much for taking pictures outside this morning; it’s also not the morning to be taking everything out of the garage to rearrange and make room for the new arrival.
Stan’s happy now, he moves to the front of the line, he’s next.gearbanger


I'll probably curse us again... but it's supposed to clear off by 11 a.m. or so, then be sunny and warm the rest of the day.  thumbsup

You weren't in the way Kevin, I now know the true meaning of 'paint jail'.  banghead


__________________

Stan S.-Twin Cities 'South Metro'

1972 Malibu Convertible 2nd time around 

2001 Mustang GT Convertible 

Forum influenced terms: 'Link Paste', 'Stanitized', & 'Revolving garage door...' 


Active Member

Status: Offline
Posts: 483
Date:
Permalink  
 

So I was thinking about getting my car painted...they said they could get me in...they just have to move a blue non SS non stripe vert chevelle out of the way first. Pretty cool huh???nana


__________________

'Gear Lube' 
emoticon-tv-002.gif


President

Status: Offline
Posts: 7328
Date:
Permalink  
 

What color are you going with .....stirpot


__________________

Mitch D.   River Falls, WI

Lifetime member of the "Cars apart Club"

1966 Chevelle SS 396 M20

1970 Chevelle SS 396 M20

1967 Camaro SS/RS 350 M20


2K+ Club

Status: Offline
Posts: 2444
Date:
Permalink  
 

Started cleaning it up yesterday, three months of body shop dust makes a real mess.

Stan here's a tip, when you bring Old Blue home, swing by a quarter car wash and blast it off, the engine compartment, frame, wheel wells, inside and especially the top then take it home and dry it off, you'll save yourself lots of time.

__________________

Kevin

Northwestern Ohio


3K+ Club

Status: Offline
Posts: 4731
Date:
Permalink  
 

dashboard wrote:

Started cleaning it up yesterday, three months of body shop dust makes a real mess.

Stan here's a tip, when you bring Old Blue home, swing by a quarter car wash and blast it off, the engine compartment, frame, wheel wells, inside and especially the top then take it home and dry it off, you'll save yourself lots of time.


Good tip Kevin.  I'm looking forward to the day I get to do that!  hyper 


__________________

Stan S.-Twin Cities 'South Metro'

1972 Malibu Convertible 2nd time around 

2001 Mustang GT Convertible 

Forum influenced terms: 'Link Paste', 'Stanitized', & 'Revolving garage door...' 


2K+ Club

Status: Offline
Posts: 2444
Date:
Permalink  
 

"looking forward to the day I get to do that!"

Here's what worked for me, just keep thinking of having to write that check out and the day comes faster.


__________________

Kevin

Northwestern Ohio


2K+ Club

Status: Offline
Posts: 2444
Date:
Permalink  
 

Starting from the back working forward, painting the new sheet metal and frame with POR15; getting the body ready for the new fuel tank installation. I’ll install the rear bumper wire up the back up and licenses lights then install the tank and the filter regulator and work forward.

We have run the engine for the last time prior to installation so it’s off the test cell and on engine stand waiting for its new home. Steve has the tune were he wants it until we can put a load on the engine then some final tweaking.


Attachments
__________________

Kevin

Northwestern Ohio


2K+ Club

Status: Offline
Posts: 2444
Date:
Permalink  
 

Today was spent cleaning and cleaning and cleaning. Cleaning the top of the top the bottom of the top as well as the dash and interior shell, 90 days of body shop dust.

The fuel tank, rear bumper, tail lights and back up lights which were optional in 65 by the way are installed and tested. The original tail lights fixtures with a single 1157 bulb were very dim so we upgraded to LED and they are retina burners, got a special deal from a friend of Barbie’s.

Tomorrow we start on the Classic Air and forward lighting.

Shops a mess whoever finds Barbie first wins an ice-cream cone in Hastings.


Attachments
__________________

Kevin

Northwestern Ohio


3K+ Club

Status: Offline
Posts: 4731
Date:
Permalink  
 

Lookin' good Kevin!  thumbsup

Can't believe I'm saying this... but can't wait until I see your tail lights!  laughing


__________________

Stan S.-Twin Cities 'South Metro'

1972 Malibu Convertible 2nd time around 

2001 Mustang GT Convertible 

Forum influenced terms: 'Link Paste', 'Stanitized', & 'Revolving garage door...' 


2K+ Club

Status: Offline
Posts: 2745
Date:
Permalink  
 

SShink wrote:

Lookin' good Kevin!  thumbsup

Can't believe I'm saying this... but can't wait until I see your tail lights!  laughing


 I dont think that will be a problem. Car is LS powered and....an A body that has 4 headlights.laughingrazz

Kevin, what LED kit did you get for the tails then?


__________________

Chris - Ramsey, MN.

Dear Optimist, Pessimist, and Realist.

While you guys were busy arguing about the glass of water. I drank it!

Sincerly,

The opportunist.


President

Status: Offline
Posts: 7328
Date:
Permalink  
 

dashboard wrote:


Shops a mess whoever finds Barbie first wins an ice-cream cone in Hastings.


 When Barb read about the "mess" she almost passed out laughing.......

Guess she's used to seeing my shop, which is a bit more disorganized than yours....laughing


__________________

Mitch D.   River Falls, WI

Lifetime member of the "Cars apart Club"

1966 Chevelle SS 396 M20

1970 Chevelle SS 396 M20

1967 Camaro SS/RS 350 M20


2K+ Club

Status: Offline
Posts: 2791
Date:
Permalink  
 

We had a throw-back to when times were simpler, and people exchanged/bartered skills or labor to get something they needed. My garage cupola was in sorry shape - totally dry-rotted and about to blow off the roof. Working with that wierd cellulose/dead-tree/wood stuff is outside my skill-set and tool kit. The Buick had dismal rear lighting, and Dashboard was inquiring about an LED upgrade. "I know a guy who can do that" we both said.

ekLED came out of mothballs for a custom job... Mr. & Mrs. Dashboard rebuilt my cupola... 'nuff said! cool


Attachments
__________________


John D. - St. Louis Park, MN.

1965 El Camino - LT-1, 4L60e, 4wh discs, SC&C susp.
2013 F-150 Platinum - Twin Turbo 3.5

2018 Factory Five MkIV Roadster build thread


Mega Poster

Status: Offline
Posts: 718
Date:
Permalink  
 

Lost in the 60s wrote:
dashboard wrote:


Shops a mess whoever finds Barbie first wins an ice-cream cone in Hastings.


 When Barb read about the "mess" she almost passed out laughing.......

Guess she's used to seeing my shop, which is a bit more disorganized than yours....laughing


 No kidding. I wish my shop was that big of a mess..

Is this Barbie?


Attachments
__________________


President

Status: Offline
Posts: 7328
Date:
Permalink  
 

Tim H wrote:

dashboard wrote:


Shops a mess whoever finds Barbie first wins an ice-cream cone in Hastings.


No kidding. I wish my shop was that big of a mess..

Is this Barbie?


I don't think so. She used to be to the far right, plying her trade on a pole....nana

That looks like flowers in a header collector...headscratch


__________________

Mitch D.   River Falls, WI

Lifetime member of the "Cars apart Club"

1966 Chevelle SS 396 M20

1970 Chevelle SS 396 M20

1967 Camaro SS/RS 350 M20


2K+ Club

Status: Offline
Posts: 2444
Date:
Permalink  
 

Chris, the LED lights are not from a kit they were hand made by friend of Barbie’s who was returning a favor; he may check in.

Each fixture has 30 individual LED bulbs that all illuminate in a bright mode when the brakes or turn signals are actuated. In the parking light mode only ten bulbs illuminate at a lower intensity setting, this is the result of some magic built into the fixture by the designer when he built them.

If there is any law governing the brightness or intensity of tail lights I may be in violation of the law; they are very intense.

Nice job Tim exceptional eyesight and attention to detail, helps explain the excellent attention to detail in your car projects.


Attachments
__________________

Kevin

Northwestern Ohio


Mega Poster

Status: Offline
Posts: 718
Date:
Permalink  
 

dashboard wrote:

Chris, the LED lights are not from a kit they were hand made by friend of Barbie’s who was returning a favor; he may check in.

Each fixture has 30 individual LED bulbs that all illuminate in a bright mode when the brakes or turn signals are actuated. In the parking light mode only ten bulbs illuminate at a lower intensity setting, this is the result of some magic built into the fixture by the designer when he built them.

If there is any law governing the brightness or intensity of tail lights I may be in violation of the law; they are very intense.

Nice job Tim exceptional eyesight and attention to detail, helps explain the excellent attention to detail in your car projects.


 I spent a lot of time just looking at the car in the pictures and happened to notice her. Your car is bitchin. I love the color and the drive train you're putting into it. Awesome.


__________________


President

Status: Offline
Posts: 7328
Date:
Permalink  
 

Guess I should've saved and magnified the pic too...doh


__________________

Mitch D.   River Falls, WI

Lifetime member of the "Cars apart Club"

1966 Chevelle SS 396 M20

1970 Chevelle SS 396 M20

1967 Camaro SS/RS 350 M20


Mega Poster

Status: Offline
Posts: 718
Date:
Permalink  
 

Lost in the 60s wrote:
Tim H wrote:

dashboard wrote:


Shops a mess whoever finds Barbie first wins an ice-cream cone in Hastings.


No kidding. I wish my shop was that big of a mess..

Is this Barbie?


I don't think so. She used to be to the far right, plying her trade on a pole....nana

That looks like flowers in a header collector...headscratch


 I usually can spot the pretty ones. It's they're smile that gets me.. razz


__________________


Super Poster

Status: Offline
Posts: 596
Date:
Permalink  
 

Those are nice looking mounts and should help with tie rod clearance.  Hopefully the oil pan and tunnel cooperate.    


-- Edited by SteveS on Tuesday 4th of June 2013 06:37:12 AM

__________________

Steve S. - Fountain, MN


1972 Chevelle - 383 stroked LS1/4L60E - SOLD!


2K+ Club

Status: Offline
Posts: 2444
Date:
Permalink  
 

These arrived late yesterday, time to getback to work.


Attachments
__________________

Kevin

Northwestern Ohio


2K+ Club

Status: Offline
Posts: 2444
Date:
Permalink  
 

Well it's back in with the new mounts only a 1001 things left to do now. I’d also like to drive it before Car Craft, but that’s only a dateline out in the future at the rate I'm going Sept may be more realistic.

I’ve changed my plan on air conditioning, I am going to install a retro Mark IV under dash unit. I plan to return my Classis Air kit, I need to pay a restock fee and shipping charge so if someone is interested in a AC kit at a great price send me a PM or give me a call.


Attachments
__________________

Kevin

Northwestern Ohio


Super Poster

Status: Offline
Posts: 596
Date:
Permalink  
 

Looks like the factory put it there thumbsup.  I'm liking the Holley Accessory mounts more all the time.  I might have to look into them in the future.


__________________

Steve S. - Fountain, MN


1972 Chevelle - 383 stroked LS1/4L60E - SOLD!


1K+ Club

Status: Offline
Posts: 1724
Date:
Permalink  
 

I love that engine cover, it is going to confuse so many people. It looks great kevin, want to do a 66 chevelle next?


__________________

Chris P
East Central, Mn

66 Chevelle 300 deluxe


2K+ Club

Status: Offline
Posts: 2745
Date:
Permalink  
 

Kevin. Is it a kit that designed just for the Skylark? Im interested. My brother might be able to use it for a 65 Skylark he has that my grandmother bought brand new.


__________________

Chris - Ramsey, MN.

Dear Optimist, Pessimist, and Realist.

While you guys were busy arguing about the glass of water. I drank it!

Sincerly,

The opportunist.


2K+ Club

Status: Offline
Posts: 2444
Date:
Permalink  
 

Chris this is not a Buick specific kit it is a Flex Fit Kit, it is what's used when there is no car specific kit for your car. It has electronic controls that adapt to your existing heater controls eliminating the cables.


__________________

Kevin

Northwestern Ohio


2K+ Club

Status: Offline
Posts: 2444
Date:
Permalink  


I really did not want to do the cutting but it had to be done. Tomorrow we’ll cut out the patch panels and start laying out the new ‘turtle back’ for installation. Should I weld it or user 3M automotive panel adhesive??

Next comes computer location under the dash between the glove box and radio is the current plan , then just 998 things left to do, closing the gap quickly don’t ya think.


Oh my I could be becoming one!


Chris R wrote:


 I dont think that will be a problem. Car is LS powered and....an A body that has 4 headlights.laughingrazz


Attachments
__________________

Kevin

Northwestern Ohio


Super Poster

Status: Offline
Posts: 663
Date:
Permalink  
 

I say weld it if you can, then cover it with insulation.

Heck..if you'd planned to cut the tunnel, you should have gone T56! LOL!

Car is looking great- can't wait to see it in person.

__________________

Scott Parkhurst

Belle Plaine


Horsepower Junkie


2K+ Club

Status: Offline
Posts: 2745
Date:
Permalink  
 

Ill go on a limb and presume a stop sign and a bunch of old license plates covered with a mexican blanket probably wont do the job then?


__________________

Chris - Ramsey, MN.

Dear Optimist, Pessimist, and Realist.

While you guys were busy arguing about the glass of water. I drank it!

Sincerly,

The opportunist.


3K+ Club

Status: Offline
Posts: 4731
Date:
Permalink  
 

Chris R wrote:

Ill go on a limb and presume a stop sign and a bunch of old license plates covered with a mexican blanket probably wont do the job then?


 laughing


__________________

Stan S.-Twin Cities 'South Metro'

1972 Malibu Convertible 2nd time around 

2001 Mustang GT Convertible 

Forum influenced terms: 'Link Paste', 'Stanitized', & 'Revolving garage door...' 


2K+ Club

Status: Offline
Posts: 2444
Date:
Permalink  
 

Didn’t get a lot done today, we put the computer placement off till next week. We did finish replacing all brake lines and hoses with new ones then bleed the system and fixed a couple of small leaks. JD that little MityVac kit with your vac bottle reservoir idea is the ticket when it come to flushing and bleeding. At least now the car has brakes so it is a little more mobile.

Tomorrow we attack the fuel system `running the larger fuel line from the new tank to the engine, then install the fuel pressure regulator and filter.

Even though we didn’t get a lot done today for the first time we went forward a little but not backwards.

997 things left to do.


Attachments
__________________

Kevin

Northwestern Ohio


2K+ Club

Status: Offline
Posts: 2739
Date:
Permalink  
 

dashboard wrote:

 We did finish replacing all brake lines and hoses with new ones then bleed the system and fixed a couple of small leaks. JD that little MityVac kit with your vac bottle reservoir idea is the ticket when it come to flushing and bleeding. At least now the car has brakes so it is a little more mobile.


 How about of photo of the rest of the system in action?


__________________

Jim L

Lake City


2K+ Club

Status: Offline
Posts: 2745
Date:
Permalink  
 

I cant get over how killer that engine cover looks.


__________________

Chris - Ramsey, MN.

Dear Optimist, Pessimist, and Realist.

While you guys were busy arguing about the glass of water. I drank it!

Sincerly,

The opportunist.


2K+ Club

Status: Offline
Posts: 2444
Date:
Permalink  
 

Jim, do you mean the brake bleeding process or the car moving on ships power?

Might be a while for the car but I could mock up the bleed kit and take some pixs if that’s what you would like to see.

Might not seem like much but the fuel line is installed and connected the engine. It took less than two hours to install the line, it took four hours to make five bends and install two clamps on the frame rail. Unlike the old fuel line that goes through the frame just behind the driver’s front tire the new one travels up the inside of the frame into the engine compartment. It needs to clear the shifter linkage and emergency brake cable, then go up and around the brake distribution manifold, clear the speedometer cable and then start toward the engine just under the brake booster. 3/8’ steel line and it all needed to be bent by hand in very close quarters; ok, so I’m whining, it was a PIA

That mock-up transmission case that John at Master Transmission loaned me is great, it only weights about 20#, two bolts and it’s out of the way.

Tomorrow I’ll complete the installation at the fuel tank. I was going to do it today but I want to install the driver’s side tailpipe first to make sure there are no conflicts.


Attachments
__________________

Kevin

Northwestern Ohio


2K+ Club

Status: Offline
Posts: 2444
Date:
Permalink  
 

Ok the tunnel will get welded. I think 3M body adhesive would be strong enough but JD makes a good point if we ever need to change it or readjust it welding is the way to go.

Fuel tank installation is complete, it’s plumed, wired and the fuel quantity gauge is dead on with five gallons in the 20.5 gal tank the gauge reads ¼ tank.

This week I hope to complete the exhaust system, it needs new down pipes with O2 bungs installed. Then start with under hood wiring and computer placement, every time I think I’ve got it figured out I change my mind. I’m down to one of two locations, drivers side under the air filter box or under the dash.

997 things left to do!


Attachments
__________________

Kevin

Northwestern Ohio


Super Poster

Status: Offline
Posts: 596
Date:
Permalink  
 

I have a bolt above and below the locater stud, but I think your talking about the next hole up.  Mine is empty, the block has no provision.  Like the picture below.

gm_ls1_rear_face.jpg


Looks like there are several posts on LS1tech about the Muscle car pan not having the passenger side bolts.

http://ls1tech.com/forums/conversions-hybrids/1624761-transmission-oil-pan-bolts.html


http://ls1tech.com/forums/conversions-hybrids/1429907-help-please-hummer-pan-missing-bellhousing-pan-bolt-boss.html


392112d1361321551-transmission-oil-pan-bolts-img_5152-small.jpg


-- Edited by SteveS on Tuesday 11th of June 2013 06:32:08 AM


-- Edited by SteveS on Tuesday 11th of June 2013 06:39:57 AM


-- Edited by SteveS on Tuesday 11th of June 2013 06:40:39 AM

__________________

Steve S. - Fountain, MN


1972 Chevelle - 383 stroked LS1/4L60E - SOLD!


2K+ Club

Status: Offline
Posts: 2791
Date:
Permalink  
 

"IT'S THE NCC BATTLE ROYALE OF THE CONVERTIBLES..."

IN THE YELLOW CORNER...CORNER...CORNER...CORNER
We have "Dashboard's - '65 Buick Special"

IN THE BLUE CORNER...CORNER...CORNER...CORNER
We have "Stan the Caveman's - '72 Malibu "Sport"

Current points tally:

Dashboard - 997 tasks/pieces left
Caveman - 1000 tasks/pieces left


WHO WILL BE THE ONE TO DRIVE THEIR "DROP-TOP" TO CAR CRAFT???


__________________


John D. - St. Louis Park, MN.

1965 El Camino - LT-1, 4L60e, 4wh discs, SC&C susp.
2013 F-150 Platinum - Twin Turbo 3.5

2018 Factory Five MkIV Roadster build thread


2K+ Club

Status: Offline
Posts: 2444
Date:
Permalink  
 

Today I reinstalled the transmission mock-up case so we can complete the exhaust system. Then as soon as the exhaust system is done I’ll remove it and the transmission case to make ready for the real transmission install; I ordered the 4L60E from John today.

I’m trying to work out two issues with the bell housing. The bolt at ten o’clock simply can not be installed with the engine in the car. I looked at using a stud but there is no clearance for it. I don’t want to bash in the firewall so I’m going to open up the dog ear on the bell housing so I can slip the bolt in from the side, pixs latter.

The other issue is the bellhousing alignment with the GM Muscle oil pan. On the oil pan only the driver’s sides bolt lines up. Bryan is checking something’s out, more on that latter.

Steve, Derek on your bellhousing is the bolt at 2 o’clock used?

This evening I spent some time with Ron and his lovely bride at the local Culvers show. First time I’ve seen Ron’s 66, it is serious muscle and a very nice looking car.

I did see Stan’s Old Blu tonight looks great, when you walk around the car Stan puts himself between you and the car like a mother bear protecting her cub.


__________________

Kevin

Northwestern Ohio


President

Status: Offline
Posts: 7328
Date:
Permalink  
 

I can see that 10 o'clock bolt hole plain as day thru that huge hole you cut in the floor. Why can't you leave an access hole with a cover in the new floor for that bolt position ?? Gotta be pretty close to the top of the carpet. Pull the rug down a bit for access in the future.


__________________

Mitch D.   River Falls, WI

Lifetime member of the "Cars apart Club"

1966 Chevelle SS 396 M20

1970 Chevelle SS 396 M20

1967 Camaro SS/RS 350 M20


2K+ Club

Status: Offline
Posts: 2444
Date:
Permalink  
 

Steve, yep that’s how the pan and bellhousing fit together, it would be nice if there was a bellhousing out there that fit. If not it will go together like it is.

Mitch, interesting idea however, the picture I think you’re looking at was taken from underneath the car at a very steep angle, it is very deceiving as to the actual placement of the bolt relative to the firewall. The one to the right with the transmission installed gives a better view/understanding of the bolt location. The bolt is well above the carpet line and unfortunately lines up with the original accelerator pedal firewall through mount, the firewall is not flat there. I think if you saw it in person it would make more sense. I can either snip the dog ear or move the engine forward to install the bolt.

With some luck once the bolts are in it won’t need to come back out in my life time; the last transmission was in there for almost 50 years


__________________

Kevin

Northwestern Ohio


President

Status: Offline
Posts: 7328
Date:
Permalink  
 

Duh.......I see it now. I was looking at the trans case to bell flange....doh

I was kinda thinking the same thing about needing to remove it. Get the dang bolt in and forgitaboutit. If the trans don't work, let John deal with it...razz


__________________

Mitch D.   River Falls, WI

Lifetime member of the "Cars apart Club"

1966 Chevelle SS 396 M20

1970 Chevelle SS 396 M20

1967 Camaro SS/RS 350 M20

«First  <  1 2 3 4 5 6  >  Last»  | Page of 6  sorted by
 
Quick Reply

Please log in to post quick replies.

Chatbox
Please log in to join the chat!