Discussion Forum - Northstar Chevelle Club
| Post Info | TOPIC: 2012-2013 A Body Winter............and into Spring Project | ||||||||
|---|---|---|---|---|---|---|---|---|---|
|
Mega Poster

|
|
||||||||
|
President

|
|
||||||||
|
2K+ Club
|
|
||||||||
|
2K+ Club
|
|
||||||||
|
President
|
|
||||||||
|
3K+ Club
|
|
||||||||
|
President
|
|
||||||||
|
2K+ Club
|
|
||||||||
|
Mega Poster
|
|
||||||||
|
2K+ Club
|
|
||||||||
|
Mega Poster
|
|
||||||||
|
Active Member

|
|
||||||||
|
President
|
|
||||||||
|
Super Poster

|
|
||||||||
|
2K+ Club
|
|
||||||||
|
2K+ Club
|
|
||||||||
|
2K+ Club
|
|
||||||||
|
President
|
|
||||||||
|
2K+ Club
|
|
||||||||
|
2K+ Club
|
|
||||||||
|
2K+ Club
|
|
||||||||
|
2K+ Club
|
|
||||||||
|
President
|
|
||||||||
|
2K+ Club
|
|
||||||||
|
President
|
|
||||||||
|
2K+ Club
|
|
||||||||
|
2K+ Club
|
|
||||||||
|
President
|
|
||||||||
|
2K+ Club
|
|
||||||||
|
2K+ Club
|
|
||||||||
|
2K+ Club
|
|
||||||||
|
Mega Poster
|
|
||||||||
|
2K+ Club
|
|
||||||||
|
Active Member
|
|
||||||||
|
President
|
|
||||||||
|
Mega Poster
|
|
||||||||
|
Mega Poster
|
|
||||||||
|
2K+ Club
|
|
||||||||
|
2K+ Club
|
|
||||||||
|
2K+ Club
|
|
||||||||
|
2K+ Club
|
|
||||||||
|
2K+ Club
|
|
||||||||
|
2K+ Club
|
|
||||||||
|
Mega Poster
|
|
||||||||
|
Mega Poster
|
|
||||||||
|
President
|
|
||||||||
|
2K+ Club
|
|
||||||||
|
2K+ Club
|
|
||||||||
|
President
|
|
||||||||
|
Mega Poster
|
|
||||||||
|
|||||||||


 all the hard work will be done. Paint, interior and drivetrain to your liking.

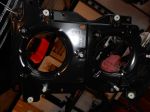
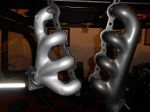
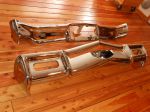
 Are those the same beat up F-body manifolds I gave you?


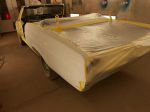


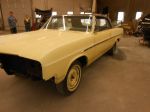

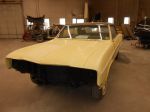

 kinda thinkin' this won't be ready for the Buick show tomorrow ....
 ...
...

|
|
||
| Chatbox | |
|---|---|
|
Please log in to join the chat!
|
|