Discussion Forum - Northstar Chevelle Club

Members Login
Username 
 
Password 
    Remember Me  
Post Info TOPIC: '96 LT1/4L60e Conversion is underway!


2K+ Club

Status: Offline
Posts: 2791
Date:
RE: '96 LT1/4L60e Conversion is underway!
Permalink  


Oh there's still a lot to be done. I'll be busy for awhile. It's getting into where it's too darn cold outside to work in the shop. I don't keep the heat on in there unless I'm working. Bringing it up to 60 or so is easy, but the floor is still 20 degrees! . There's projects in the house for the winter...


__________________


John D. - St. Louis Park, MN.

1965 El Camino - LT-1, 4L60e, 4wh discs, SC&C susp.
2013 F-150 Platinum - Twin Turbo 3.5

2018 Factory Five MkIV Roadster build thread


2K+ Club

Status: Offline
Posts: 2791
Date:
Permalink  
 

Well, the saga continues, but with a happy ending.

The part number I gave to Bryan was wrong. The new cooler had much larger fittings than the one needed. What I really need is the VIN off the donor truck to get the proper part.

Head north from Fridley to U-Pull-It in East Bethel, in the hope that the Suburban I scrounged the cooler from is still there. Throw down my $2 and sig and go in the yard. Sunuvagun they crushed it. Maybe??, just maybe?? What's that over there? Another Suburban! Does it? Maybe?..... SCORE!! The exact oil cooler I need is sitting behind the grille.

Do I have any tools? No, unless you count the Leatherman I alway carry. Lady Luck smiled on me today. When they pulled the engine they sawed through the hoses - and the pop rivets to the brackets were rotted - it popped off in my hand in 10 seconds. $6 lighter I was on the way back to Fridley, cooler and VIN in hand (literally biggrin).

We did a VIN search and found the correct part number. Of course a new one is DOUBLE the cost of the one I ordered - or the price of 2-1/2 aftermarket units. The only reason for my persistance in getting a replacement is the time & materials I've already got invested. To change to a different unit would be a LOT of work!

Got #2 scrounger cooler home and immediately pressure tested it. PASS! Got it cleaned up, painted and installed. Fired up the beast and NO LEAKS!! WooHOO!

(Thank you Bryan for your help with this!)


__________________


John D. - St. Louis Park, MN.

1965 El Camino - LT-1, 4L60e, 4wh discs, SC&C susp.
2013 F-150 Platinum - Twin Turbo 3.5

2018 Factory Five MkIV Roadster build thread


President

Status: Offline
Posts: 7328
Date:
Permalink  
 

Are you able to return the new, incorrect, unit or was it a special order ?

__________________

Mitch D.   River Falls, WI

Lifetime member of the "Cars apart Club"

1966 Chevelle SS 396 M20

1970 Chevelle SS 396 M20

1967 Camaro SS/RS 350 M20


2K+ Club

Status: Offline
Posts: 2791
Date:
Permalink  
 

It was a special order piece no

__________________


John D. - St. Louis Park, MN.

1965 El Camino - LT-1, 4L60e, 4wh discs, SC&C susp.
2013 F-150 Platinum - Twin Turbo 3.5

2018 Factory Five MkIV Roadster build thread


2K+ Club

Status: Offline
Posts: 2791
Date:
Permalink  
 

Spending a few hours in the basement workshop...

One of the neat things about the GM 'puter for the engine is it has some pretty robust "driver" circuits built in to run the original idiot lights for the Roadmaster dash. Examples are:
Low Coolant
Low Washer Fluid
Low Oil
Oil Pressure
Change Oil
Alternator Fail/Hi/Low
High Temp
Low Fuel

These driver circuits "go low", or short to ground when one of these conditions is present. They're also in their own bundle of wires in the engine harness loom.

I swapped the original idiot light dash cluster to the SS version (gauges) last year. The problem with gauges is they just sit there, and unless you consciously look every few seconds you might not catch something.

The plan is to install some very discreet & hidden LED's in the '65 dash housing that will come on under these conditions. A warning light popping on grabs your attention a lot quicker than watching a needle. The best part is there's no monitoring circuitry needed - it's already in the computer. I just have to supply +12 to one side of the LED, and the computer supplies ground.

__________________


John D. - St. Louis Park, MN.

1965 El Camino - LT-1, 4L60e, 4wh discs, SC&C susp.
2013 F-150 Platinum - Twin Turbo 3.5

2018 Factory Five MkIV Roadster build thread


3K+ Club

Status: Offline
Posts: 4731
Date:
Permalink  
 

But does it turn on the bat spotlight over Gotham City when you pull in the garage?  biggrin

Seriously John, you are one creative dude.  I love how you you incorporate the old with the new while not loosing the real roots of the car. 


__________________

Stan S.-Twin Cities 'South Metro'

1972 Malibu Convertible 2nd time around 

2001 Mustang GT Convertible 

Forum influenced terms: 'Link Paste', 'Stanitized', & 'Revolving garage door...' 


2K+ Club

Status: Offline
Posts: 2791
Date:
Permalink  
 

"Atomic Batteries to power.... Turbines to speed... ready to move out!"

That's the whole plan... taking late-model convenience, handling, drive-ability, accessories, all the stuff we've taken for granted driving "belly-buttons" the last 20 years and wrapping (or hiding it wink)  it into a 45 year old shell - while not losing the appeal of an old classic in the process.

(Yes, I'm taking pictures).


__________________


John D. - St. Louis Park, MN.

1965 El Camino - LT-1, 4L60e, 4wh discs, SC&C susp.
2013 F-150 Platinum - Twin Turbo 3.5

2018 Factory Five MkIV Roadster build thread


Mega Poster

Status: Offline
Posts: 710
Date:
Permalink  
 

Years ago someone had a gauge pkg that would have a light flash when certain peramiters were not met or out of spec. Now I need to rack my brain as to who had the pkg.

__________________


2K+ Club

Status: Offline
Posts: 2791
Date:
Permalink  
 

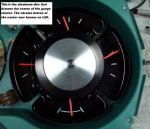
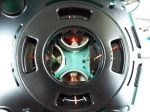
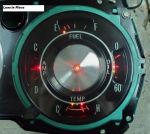
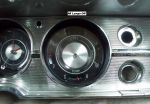
Latest installment on the project. I've finished up the modifications to the instrument cluster for my indicator LED's. There was no obvious location for the "SES - Service Engine Soon" light. I didn't want a hole in the chrome bezel for it, there wasn't an existing lamp/indicator I could make into a dual output or two-color display...

I kept coming back to the gauge cluster, then it hit me. Something right in the center of the other monitoring devices.
I'm very pleased with the results biggrin...


Attachments
__________________


John D. - St. Louis Park, MN.

1965 El Camino - LT-1, 4L60e, 4wh discs, SC&C susp.
2013 F-150 Platinum - Twin Turbo 3.5

2018 Factory Five MkIV Roadster build thread


2K+ Club

Status: Offline
Posts: 2791
Date:
Permalink  
 

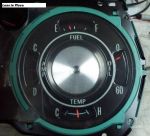
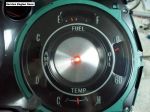
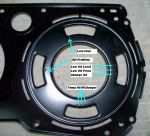
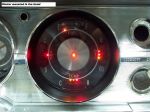
Part II - Fuel, Oil, Coolant, and Electrics monitoring.

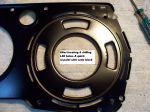
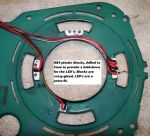
This job was a chore. Modifying the center disc was relatively easy, and I had a spare disc & button if I screwed up. Taking a very hard to find (and not re-pop'd) gauge assembly and drilling 8 holes in it was a test of faith & ability.

I did make a drilling jig out of tiny brass tubing (the stuff you find in hobby shops) that fits perfectly around the "windows" for the gauges. This way I could clamp it in place and drill the holes exactly in the same locations, with the same spacing, on every opening. I used a Dremel tool drill press, and an .035 bit.

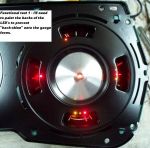
After drilling all the holes, and knocking the burrs off with a small countersink, I resprayed the face of the gauge panel with satin black.

The wiring to the LED's comes back to a DB-15 connector (the same connector on your PC's monitor). The mating 1/2 is mounted in the gauge cluster. This allows for dis-assembling the gauge cluster if needed (or if you do something stupid and reverse polarize an LED and blow it up...confuse)

This turned out really cool biggrin

Attachments
__________________


John D. - St. Louis Park, MN.

1965 El Camino - LT-1, 4L60e, 4wh discs, SC&C susp.
2013 F-150 Platinum - Twin Turbo 3.5

2018 Factory Five MkIV Roadster build thread


Mega Poster

Status: Offline
Posts: 713
Date:
Permalink  
 

Very Nice!


__________________

John E - Rogers, MN

Instructions? All I need is the exploded view.
70 El Camino soon to be ls1/t56
64 Malibu SS


Mega Poster

Status: Offline
Posts: 710
Date:
Permalink  
 

Enganeer wrote:

Very Nice!


Now what is he going to charge to redo our gauges? a


__________________


Founding Member

Status: Offline
Posts: 2792
Date:
Permalink  
 

That's awesome!

__________________

Derek Kiefer - Mantorville, MN

69 Malibu Pro-Touring stroker LS1-383/T56 - 69 SS396-325/3spd project


3K+ Club

Status: Offline
Posts: 4731
Date:
Permalink  
 

John, that is so stealthy it's way cool!!!  worship.gif

I can't believe how discrete the LED's are when off yet how visible when on.  I especially liked how you located the LED's in a place that means something for the function (i.e. the 'low fuel' LED is on the 'E' side of the analog gauge)!

Your mix of electronics and old skool is cool!

__________________

Stan S.-Twin Cities 'South Metro'

1972 Malibu Convertible 2nd time around 

2001 Mustang GT Convertible 

Forum influenced terms: 'Link Paste', 'Stanitized', & 'Revolving garage door...' 


President

Status: Offline
Posts: 7328
Date:
Permalink  
 

Wow, makes me wish I had payed attention in school so I knew what you were talking about...no I HATE computerized cars and you make them do whatever YOU want.

__________________

Mitch D.   River Falls, WI

Lifetime member of the "Cars apart Club"

1966 Chevelle SS 396 M20

1970 Chevelle SS 396 M20

1967 Camaro SS/RS 350 M20


2K+ Club

Status: Offline
Posts: 2791
Date:
Permalink  
 

I'm in a similar camp - My work truck makes me NUTS driving around town and the friggin' dash display is telling me "tire pressure"... "Headlights suggested"... "Traction Control Active"... If you're so darn smart truck, YOU drive yourself to the next call!

But... If we want to get 350+ HP, run on 87 octane, idle at 700 RPM and pull 25+ MPG, we've got to succumb to computer control and fuel injection. These specifications were all but impossible when our cars were built. The technology didn't exist yet.

The indicator lights I modded in were already a part of the engine management computer. The factory used incandescent bulbs in the dash cluster. I'm just using LED's in their place.

The real test is coming soon. My gorgeous, beautiful, caring, understanding, wonderful, tolerant wife bought me a JET Dynamic Spectrum Tuner kit and software for Christmas. Once I get the wiring cut into the '65 harness I can "plug in" to the engine and computer then REALLY screw things up!!

This will be a real learning curve for me. The electronics are the easy part - electrons are electrons, ohms are ohms. But plugging in and altering/deleting/changing the engine's operating parameters scares me to my boots. Luckily there is a "fail-safe" built into the software - you download the existing factory settings first, and save them - then you go in and tinker. If things go hopelessly wonky, you can restore/upload the original settings and start again.


__________________


John D. - St. Louis Park, MN.

1965 El Camino - LT-1, 4L60e, 4wh discs, SC&C susp.
2013 F-150 Platinum - Twin Turbo 3.5

2018 Factory Five MkIV Roadster build thread


2K+ Club

Status: Offline
Posts: 2791
Date:
Permalink  
 

I must have a streak of masochism. I spend 8 hours today pulling wire, fishing the doorframe from HELL for a lock, contact and card reader... and what do I do when I get home? Spend 4 more hours dealing with wires. confuse 

I've got the LT-1 engine harness wires, the "idiot light/LED" harness, and the diagnostic plug harness routed up, over, around the heater box and into the instrument cluster void.

Tomorrow (or maybe the next day) I have to splice/cut-in about a dozen wires, install the instrument cluster, and see if everything works. If so, I should be able to just turn the key and have Vroom!

__________________


John D. - St. Louis Park, MN.

1965 El Camino - LT-1, 4L60e, 4wh discs, SC&C susp.
2013 F-150 Platinum - Twin Turbo 3.5

2018 Factory Five MkIV Roadster build thread


Mega Poster

Status: Offline
Posts: 710
Date:
Permalink  
 

John D wrote:

I must have a streak of masochism. I spend 8 hours today pulling wire, fishing the doorframe from HELL for a lock, contact and card reader... and what do I do when I get home? Spend 4 more hours dealing with wires. confuse 

I've got the LT-1 engine harness wires, the "idiot light/LED" harness, and the diagnostic plug harness routed up, over, around the heater box and into the instrument cluster void.

Tomorrow (or maybe the next day) I have to splice/cut-in about a dozen wires, install the instrument cluster, and see if everything works. If so, I should be able to just turn the key and have Vroom!


 That is why I like John, when I get to that point years from now he will know how to wire my car. biggrin


__________________


2K+ Club

Status: Offline
Posts: 2791
Date:
Permalink  
 

Know how??

Jeeez - At this stage of the game I can recite and sketch a complete wiring diagram (with colors) for the entire car from memory! biggrin

(It's kinda like after a too-long trip to 'Vegas... you keep hearing the "dingdingdingding" of the slot machines in your head 2 weeks after coming home....)

__________________


John D. - St. Louis Park, MN.

1965 El Camino - LT-1, 4L60e, 4wh discs, SC&C susp.
2013 F-150 Platinum - Twin Turbo 3.5

2018 Factory Five MkIV Roadster build thread


President

Status: Offline
Posts: 7328
Date:
Permalink  
 

John D wrote:
Know how??

Jeeez - At this stage of the game I can recite and sketch a complete wiring diagram (with colors) for the entire car from memory! biggrin

(It's kinda like after a too-long trip to 'Vegas... you keep hearing the "dingdingdingding" of the slot machines in your head 2 weeks after coming home....)

You've been to Vegas too ??? I can't deal with computerized cars and have NEVER been to Vegas. I'm feeling more inadequate all the time...cry

Once my firewall/heater restoration is complete, I get to start on rewiring my car from scratch with a new "update" kit.


__________________

Mitch D.   River Falls, WI

Lifetime member of the "Cars apart Club"

1966 Chevelle SS 396 M20

1970 Chevelle SS 396 M20

1967 Camaro SS/RS 350 M20


2K+ Club

Status: Offline
Posts: 2791
Date:
Permalink  
 

The "cut-in" is all done, and have only discovered 2 problems...

1) I'm going to have to research the specs on the '96 temp sender - the '65 gauge does not like the signal, and pegs itself. I may have to put the '65 sender in. The LT-1 has two temp senders - one for the computer, one for the "car". Gotta think on this one.

2) Had a little dyslexia problem with one wire on "connector C204" on the engine harness. This is the big connector that plugs the engine into the car in the passenger compartment. Seems I transposed hole #J6 for hole #A6. Not too important... IT'S ONLY THE DAMN DATA WIRE THAT THE TUNER SOFTWARE USES TO "TALK" TO THE COMPUTER!! furious I spent about 1-1/2 hours checking continuity between the PCM and the dash diagnostic socket, and finally realized that a wire was 180 out/inverted in the connector. One of those front-side/back-side flip brainfart things between looking at the pin-out diagram and getting to the connector.

(My darling,gorgeous,wonderful,caring,tolerant,sweetheart of a wife gave me JET's "OBDII Dynamic Spectrum Tuner" interface and software for Christmas! This was one of the big-ticket items that was REALLY holding up the show.)

The 1-1/2 hours wire chasing was after about 3 hours of checking the dang laptop's COMM/serial port. Making sure it was enabled, checking settings, etc.. The JET software doesn't have any documentation or help file on COMM port settings - so I'm trying a zillion permutations of baud, parity, flow control, etc. trying to get the dang thing to "talk" to the car. As it turns out (after you have a friggin wire connected to the car's PCM  biggrinconfuse ) the software auto-adjusts the serial port/COMM parameters.

It is very cool - turn the key and all my indicators light up in "test mode" (just like a new car) then go out. Twist to Start and it barely cranks 3 turns and fires.

Of course my MIL/SES light was "on", because about 25 things were AWOL in the programming (such as EGR, air pump, Cats, rear O2 sensors) and the PCM probably did a huge "WTF is going on"... so I hooked up and punched a cool little button marked "Erase DTC's". Zap - all error codes are gone, and the light is out.

I've just started looking indepth into the programming files and tables. This is VERY cool! I'm not going to mess with any of the fuel or ignition setting right now - these areas are very scary... but I have gone in and disabled all the aforementioned sensors & inputs that are no longer on the car and uploaded the changes to the PCM.

Another cool thing in the factory program is in the transmission section. There is a "performance mode" table! Higher shift points vs. throttle position vs. speed, etc. The '95 & earlier F-bodys had a dash switch to enable/disable this function. They (GM) didn't carry over the feature to Roadies or Impala SS's in '96, but the tables & parameters are there! Just copy the perf table, and paste it over the "normal" table and the trans is in permanent performance mode.

This is getting fun!


__________________


John D. - St. Louis Park, MN.

1965 El Camino - LT-1, 4L60e, 4wh discs, SC&C susp.
2013 F-150 Platinum - Twin Turbo 3.5

2018 Factory Five MkIV Roadster build thread


3K+ Club

Status: Offline
Posts: 4731
Date:
Permalink  
 

That's got to be VERY satisfying John.  You are so close now.  Spending the time troubleshooting isn't always fun, but at least you figured it out and learned some things along the way!  biggrin

Can't wait to hear it roar!  smile

We could trailer it 300 or 400 miles south and get some 'real' drive testing done where it's warmer so that you don't have to wait until April to drive it.  What do ya think?!?!  Sounds like it's time for a road trip! biggrin

__________________

Stan S.-Twin Cities 'South Metro'

1972 Malibu Convertible 2nd time around 

2001 Mustang GT Convertible 

Forum influenced terms: 'Link Paste', 'Stanitized', & 'Revolving garage door...' 


1K+ Club

Status: Offline
Posts: 1724
Date:
Permalink  
 

John the newer temp sender is totally different resistance values. I have yet to find a sender that is correct values that screws into the smaller 3/8 hole. All the old senders with the correct resistance are 1/2 inch. If you find one that is correct please let me know, my gauge in the camaro works but is off some.

Actually I beleive these are the values:

1965 -  350 ohms 100 degrees and 50 ohms at 260 degrees
1995 -  1365 ohms 100 degrees and 50 ohms at 260 degrees

-- Edited by 67ss on Monday 3rd of January 2011 08:26:39 AM

__________________

Chris P
East Central, Mn

66 Chevelle 300 deluxe


President

Status: Offline
Posts: 7328
Date:
Permalink  
 

SShink wrote:
That's got to be VERY satisfying John.  You are so close now.  Spending the time troubleshooting isn't always fun, but at least you figured it out and learned some things along the way!  biggrin

Can't wait to hear it roar!  smile

We could trailer it 300 or 400 miles south and get some 'real' drive testing done where it's warmer so that you don't have to wait until April to drive it.  What do ya think?!?!  Sounds like it's time for a road trip! biggrin


There goes John again. Talking all that Geek language that leaves my eyes glazed over....confuse

400 miles will only get ya to KC and they are almost as cold as us with snow on the ground. If you're gonna drive 7 hours, why not 10-11 and be in southern Kansas/northern Oklahoma ? Even warmer still and I know a salvage yard in Aline OK that we could get a quarter pillar cut-off for Bryan at....wink


__________________

Mitch D.   River Falls, WI

Lifetime member of the "Cars apart Club"

1966 Chevelle SS 396 M20

1970 Chevelle SS 396 M20

1967 Camaro SS/RS 350 M20


2K+ Club

Status: Offline
Posts: 2791
Date:
Permalink  
 

There goes John again. Talking all that Geek language that leaves my eyes glazed over....confuse


Ok, in non-GeekSpeak...

The problem was:
My laptop is trying to call the engine computer and tell it what to do, but one of the two phone wires is cut.

All the other gibberish is setting up:
- What phone do I use to talk to you (Comm port)
- how many words per second I can talk to you (baud rate)
- how many letters (maximum) can be in each word (bits)
- Do I talk "on the beat", "off the beat", or you don't care (parity - even/odd/none)
- Do you control the flow of words, or do I (flow control)

Easier??


__________________


John D. - St. Louis Park, MN.

1965 El Camino - LT-1, 4L60e, 4wh discs, SC&C susp.
2013 F-150 Platinum - Twin Turbo 3.5

2018 Factory Five MkIV Roadster build thread


President

Status: Offline
Posts: 7328
Date:
Permalink  
 

John D wrote:

There goes John again. Talking all that Geek language that leaves my eyes glazed over....confuse


Ok, in non-GeekSpeak...

The problem was:
My laptop is trying to call the engine computer and tell it what to do, but one of the two phone wires is cut.

All the other gibberish is setting up:
- What phone do I use to talk to you (Comm port)
- how many words per second I can talk to you (baud rate)
- how many letters (maximum) can be in each word (bits)
- Do I talk "on the beat", "off the beat", or you don't care (parity - even/odd/none)
- Do you control the flow of words, or do I (flow control)

Easier??


Somewhat. Parity and flow control are still on the fringes of comprehesion.
Hey, I took a huge leap of faith and installed a Pertronix III in my Camaro last year. My 70 Chevelle still has points...smile The 66 has an OEM HEI that worked when I took the engine out and I have to get the wiring right for it when it goes back....ashamed


__________________

Mitch D.   River Falls, WI

Lifetime member of the "Cars apart Club"

1966 Chevelle SS 396 M20

1970 Chevelle SS 396 M20

1967 Camaro SS/RS 350 M20


1K+ Club

Status: Offline
Posts: 1724
Date:
Permalink  
 

The 66 has an OEM HEI that worked when I took the engine out and I have to get the wiring right for it when it goes back....


I'm sure you know this but make sure you run full 12 volts to your HEI and not to hook it up to the resistence wire that went to the orignal coil. I usually go right to the connector at the firewall and back that pin out with the resistance wire and cut the wire off. Then solder and new wire to that pin shove it back in the connector and tape it all back in to look factory.

__________________

Chris P
East Central, Mn

66 Chevelle 300 deluxe


President

Status: Offline
Posts: 7328
Date:
Permalink  
 

67ss wrote:

The 66 has an OEM HEI that worked when I took the engine out and I have to get the wiring right for it when it goes back....


I'm sure you know this but make sure you run full 12 volts to your HEI and not to hook it up to the resistence wire that went to the orignal coil. I usually go right to the connector at the firewall and back that pin out with the resistance wire and cut the wire off. Then solder and new wire to that pin shove it back in the connector and tape it all back in to look factory.


I bought an American AutoWire update kit and it comes with the option for HEI distributors. I haven't started on the wiring yet, but soon I'm gonna have to get brave. I found a kit to convert an external alternator to a 1 wire and will do that and wire the car for internal regulator too. It will look original at a glance, with the correct alt body, but no regulator on the core support. I will also run full voltage to the headlights by having the switch run to a relay.


__________________

Mitch D.   River Falls, WI

Lifetime member of the "Cars apart Club"

1966 Chevelle SS 396 M20

1970 Chevelle SS 396 M20

1967 Camaro SS/RS 350 M20


2K+ Club

Status: Offline
Posts: 2745
Date:
Permalink  
 

I remember being over at Keith Andersons place (05 I think) the friday of Car Craft while he tuned his El Camino on a laptop for the 1st time w/that software. I think he went back to EFI that year. Once you get the laptop working with the vehicle. Its pretty trick on how to tune it and what things you can do.

__________________

Chris - Ramsey, MN.

Dear Optimist, Pessimist, and Realist.

While you guys were busy arguing about the glass of water. I drank it!

Sincerly,

The opportunist.


2K+ Club

Status: Offline
Posts: 2791
Date:
Permalink  
 

It's pretty intimidating at first, but once you know the acronyms and monkey with it for a while (and know where NOT to tinker wink) it's cool.

For the daring... you can download a "demo" version of the software, with 2 "tuning" databases here: JET DST 

Install it on your PC and monkey around!

__________________


John D. - St. Louis Park, MN.

1965 El Camino - LT-1, 4L60e, 4wh discs, SC&C susp.
2013 F-150 Platinum - Twin Turbo 3.5

2018 Factory Five MkIV Roadster build thread


2K+ Club

Status: Offline
Posts: 2791
Date:
Permalink  
 

FYI for y'all...

No wonder LT-1's respond to a little tuning, especially in some of the baseline parameters:

Stock:
Cooling fan #1 "on" @ 107C (225F)
Cooling fan #2 "on" @ 111C (232F)

Man they like to run these things HOT!

__________________


John D. - St. Louis Park, MN.

1965 El Camino - LT-1, 4L60e, 4wh discs, SC&C susp.
2013 F-150 Platinum - Twin Turbo 3.5

2018 Factory Five MkIV Roadster build thread


Founding Member

Status: Offline
Posts: 2792
Date:
Permalink  
 

#1 comes on automatically with the A/C on, and they rarely ever come on while driving, so they don't get that hot very often. Supposedly they did that to reduce emissions while idling in traffic.

__________________

Derek Kiefer - Mantorville, MN

69 Malibu Pro-Touring stroker LS1-383/T56 - 69 SS396-325/3spd project


2K+ Club

Status: Offline
Posts: 2791
Date:
Permalink  
 

I'm also assuming that with the coolant flow improvements in this engine generation, and that Impala's and Roadies have about 7 sq. ft. of aluminum radiator area, that it would stay cool just by design.

Due to space (and me being a cheap SOB) I'm still running the 45 year old brass/copper original, at about 5 sq. ft. of area. Because of the inherant inefficiency of this I reset the parameters to 200F and 215F.

The car will sit and idle about 15 - 20 minutes before #1 turns on, and this must be enough as #2 never comes on (just sitting). I'm sure there'll be further adjustments once "cruising season" starts, and it's 85deg. outside.

__________________


John D. - St. Louis Park, MN.

1965 El Camino - LT-1, 4L60e, 4wh discs, SC&C susp.
2013 F-150 Platinum - Twin Turbo 3.5

2018 Factory Five MkIV Roadster build thread


Secretary

Status: Offline
Posts: 2941
Date:
Permalink  
 

John, measure your radiator. My aluminum w/plastic tank one is from an 87 Caprice IIRC, fits perfectly in the OEM space. 1-800-radiator has dimensions on thier website, maybe you can find an OEM one that would match size pretty close?

__________________

Bryan-NW 'burbs
1972 Malibu
Vaguely stock appearing, and the opposite of restored.
1999 std bore 5.7, Vortec heads, Holley Stealth Ram, GM cam
700R4, Viking coilovers, 12 bolt 4.10 posi, and a whole bunch more


Mega Poster

Status: Offline
Posts: 710
Date:
Permalink  
 

I do have a new radiator from the Corvette if you need.

__________________


Founding Member

Status: Offline
Posts: 2792
Date:
Permalink  
 

Early cars had the narrower radiators with the top & bottom tanks, not the side tanks like all the newer stuff has...

__________________

Derek Kiefer - Mantorville, MN

69 Malibu Pro-Touring stroker LS1-383/T56 - 69 SS396-325/3spd project


2K+ Club

Status: Offline
Posts: 2791
Date:
Permalink  
 

I'm not looking to change it out... my original is a 3-row "Harrison" that kept the 327 and the 383 cool. (Even at the CC autocross in 80 deg's and hammering on it, the cooling system didn't boil over - just got hard to start.) Also, to keep "in theme" the original radiator needs to stay.

I was just a little concerned that GM would allow the engine to get that hot before kicking in aux cooling.

Now that I'm running two 10" fans I should have no worries about airflow or cooling, and it's sealed with a 16lb. cap.

__________________


John D. - St. Louis Park, MN.

1965 El Camino - LT-1, 4L60e, 4wh discs, SC&C susp.
2013 F-150 Platinum - Twin Turbo 3.5

2018 Factory Five MkIV Roadster build thread


President

Status: Offline
Posts: 7328
Date:
Permalink  
 

John D wrote:
I'm not looking to change it out... my original is a 3-row "Harrison" that kept the 327 and the 383 cool. (Even at the CC autocross in 80 deg's and hammering on it, the cooling system didn't boil over - just got hard to start.) Also, to keep "in theme" the original radiator needs to stay.

I was just a little concerned that GM would allow the engine to get that hot before kicking in aux cooling.

Now that I'm running two 10" fans I should have no worries about airflow or cooling, and it's sealed with a 16lb. cap.


Those default temps are surprising. I wouldn't want my engine running that hot either. If you have a 195° stat, the 200 setting on the primary may be a tad too low and cause the fan to cycle often. Guess you'll know after you've had a chance to drive the car more wether it needs to be bumped up a few degrees.


__________________

Mitch D.   River Falls, WI

Lifetime member of the "Cars apart Club"

1966 Chevelle SS 396 M20

1970 Chevelle SS 396 M20

1967 Camaro SS/RS 350 M20


2K+ Club

Status: Offline
Posts: 2791
Date:
Permalink  
 

Guess you'll know after you've had a chance to drive the car more wether it needs to be bumped up a few degrees.

Exactly what I was thinking. Right now I can just idle it in the shop, and it's cool in there. Real world testing will have to wait a few months. What's really neat is changing the on/off cycle is about a 3 minute upload from the laptop! No changing sensors or anything.


__________________


John D. - St. Louis Park, MN.

1965 El Camino - LT-1, 4L60e, 4wh discs, SC&C susp.
2013 F-150 Platinum - Twin Turbo 3.5

2018 Factory Five MkIV Roadster build thread


2K+ Club

Status: Offline
Posts: 2791
Date:
Permalink  
 

I'm a few steps closer to graduating from CAC!

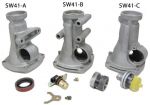
My tailshaft/cone conversion kit arrived yesterday. I bit the bullet and dropped the $$$ on the setup - a modified 700R4 tailcone that has both the VSS pickup and the mechanical speedo drive.
I didn't get it from Shiftworks however. Through some arduous searching I found the outfit that MAKES them for Shiftworks, PATC, and the other vendors. Let's say that going to the source was "beneficial". This hunk of aluminum was the 2nd largest expendature of the project.

I'll probably install this tonight, put on my propeller cap and imagineer the parking brake cable setup while I'm under there.

-- Edited by John D on Wednesday 12th of January 2011 12:30:00 PM

Attachments
__________________


John D. - St. Louis Park, MN.

1965 El Camino - LT-1, 4L60e, 4wh discs, SC&C susp.
2013 F-150 Platinum - Twin Turbo 3.5

2018 Factory Five MkIV Roadster build thread


2K+ Club

Status: Offline
Posts: 2791
Date:
Permalink  
 

The Speedo/VSS conversion is in. Very well engineered piece. Quality workmanship and well thought out... other than the install instructions/procedure.

They don't give a specific measurement of where to locate the speedometer gear on the output shaft - I.E. how far from the end of the output shaft to the face of the gear/reluctor assy. They state:
"By looking through the driven gear housing hole, center the drive gear in the hole for the driven gear housing".

That's pretty darn vague, especially dealing with gears! Being my anal-retentive self I did make measurements on & off the bench and locked the drive gear assy. in what should be smack in the center of tooth engagement.

The other "fun" part is getting a 3-jaw puller (with long enough "ears") up into the driveshaft tunnel to pull off the old reluctor wheel! It's a press fit, and fights removal for all of it's 3/4" of shaft travel!

They're not too far off their stated mark of "1/2 hour install time" - IF you have the car in the air, and IF you have the correct puller.

My advise to others using this system... do the work/conversion on the bench with the trans out. It will be lots easier to set up.

(The mercury was dropping too fast for the parking brake job - Exel Energy is already sending me gift baskets... another day for that.  biggrin)

__________________


John D. - St. Louis Park, MN.

1965 El Camino - LT-1, 4L60e, 4wh discs, SC&C susp.
2013 F-150 Platinum - Twin Turbo 3.5

2018 Factory Five MkIV Roadster build thread


Active Member

Status: Offline
Posts: 195
Date:
Permalink  
 

If you are still having problems with connecting diagnostics (oil, temp...) to the gauges for an easy fix I would suggest scowering the Speedway online catalog. With my LS swap I used many of their adapters and they work great. I cannot find these from anyother major online distributor.

For example the temp sender in the LS head has a 12mm? thread and of course the eletronics are different then that in a factory Chevelle gauge or in my Autometer gauges. Speedway sells the adapter to go from this 12mm thread to a 3/8" npt for a slim factory style sender. Same for my oil pressure gauge and sender. Not to mention the adapters are only $8-$12 a piece.

__________________

Andy

Southern Suburbs


2K+ Club

Status: Offline
Posts: 2791
Date:
Permalink  
 

Latest installment:
Too dang cold to putz in the garage, so it's "stick a DVD in the box" and tinker in the basement shop.

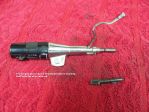
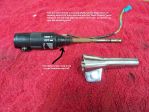
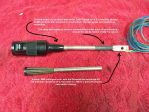
I'm going to replace the '69 to '80 vintage "Delco Cruise-Master" cruise control system with the unit from the '96 Roadhog.

- The early version is a very simplistic unit, with basically a speed-hold only capability. It is driven by the speedometer cable, and uses a vacuum diaphragm and linkage to the throttle for speed control.
- The late model give you set/coast, resume/accel, and an on/off switch. It is a direct cable connect to the throttle shaft, and uses the electronic pulse from the VSS sensor in the transmission.

The problem is the control switch on the turnsignal stalk.
- All the aftermarket units (that I could get information for) use a N.O. (normally open) contact for "resume", and a N.C. (normally closed) contact for "set". This isn't a problem for the aftermarket cruise systems, as they have configuration settings to adjust them for different types of control switches.
- The '96 unit requires both functions (set and resume) to be N.O. contacts!

So, I have to modify a late model switch to mount (and look decent) to my '65 turnsignal stalk... the wiper controls have to go.


Attachments
__________________


John D. - St. Louis Park, MN.

1965 El Camino - LT-1, 4L60e, 4wh discs, SC&C susp.
2013 F-150 Platinum - Twin Turbo 3.5

2018 Factory Five MkIV Roadster build thread


3K+ Club

Status: Offline
Posts: 4731
Date:
Permalink  
 

John, I think you should call the Elky the 'Stealthmaster' the way you are blending the new parts with the old ones!  wink

__________________

Stan S.-Twin Cities 'South Metro'

1972 Malibu Convertible 2nd time around 

2001 Mustang GT Convertible 

Forum influenced terms: 'Link Paste', 'Stanitized', & 'Revolving garage door...' 


Super Poster

Status: Offline
Posts: 596
Date:
Permalink  
 

Looks good John.  I've been looking for a way to wire cruise into my LS1 swap.  I found this guy's build where he took a turn signal stalk from a '89 corvette &  put a chevelle end on it.  The vette stalk doesn't have any of the wiper stuff on it, only a bright headlight indicator marking.  Look at the pictures towards the bottom of  this page: Cruise Lever

__________________

Steve S. - Fountain, MN


1972 Chevelle - 383 stroked LS1/4L60E - SOLD!


2K+ Club

Status: Offline
Posts: 2791
Date:
Permalink  
 

Cleaner yet... I may be looking for an '89 vette lever, hmm... LARRY!!

__________________


John D. - St. Louis Park, MN.

1965 El Camino - LT-1, 4L60e, 4wh discs, SC&C susp.
2013 F-150 Platinum - Twin Turbo 3.5

2018 Factory Five MkIV Roadster build thread


Super Poster

Status: Offline
Posts: 596
Date:
Permalink  
 

I looked into it at one time. I think 84-89 levers are the same. The down side is they would be far and few between in a salvage yard. They show up on ebay for $50+ most of the time. If Larry has some let me know too.


__________________

Steve S. - Fountain, MN


1972 Chevelle - 383 stroked LS1/4L60E - SOLD!


2K+ Club

Status: Offline
Posts: 2791
Date:
Permalink  
 

Down to about the last few "projects"...

Wrenching on "pushrod's" car got my mind right, and mother nature's reprieve from the negative temps re-focused me on only 88 days left.

Installed the '96 cruise control on Sunday.  This was a not-so-gentle reminder of just how much room ISN'T available under the dash on a '65, and why I got out of the car-fi business! Converting from the vacuum controlled "Cruise-Master" to the VSS controlled system also revealed a problem. There was a leak on the old system (hiiiisssss), only audible when you moved the hoses. The engine never idled down to the spec'd 750 rpm before. Now it does and idles much smoother.

Got the parking brake cable system figured out.
(Using the Caddy Seville/Eldo rear disc calipers you must have a functional parking brake. The calipers use a screw-jack mechanism to adjust for pad wear, and it works off of the parking brake.) 
Had to just lay under the car and STARE confuse at it for awhile until the "light bulb" came on. The un-used rear crossmember/trans-mount pad on the tailcone is now a mounting point for a sheave for the cable to the RR wheel. I made up a little "pulley" out of 2 fender washers and a spacer, and bolted this to the RH trans mount pad hole on the tailcone.

The last parking brake problem was an existing one. When I lowered the car, the sleeved parking brake cables from the frame to the rear calipers became too short. When the suspension compressed the parking brakes would actually apply. A paruse through the NAPA brake parts catalog (the guys at my local store just groan and hand me the books now...biggrin ) revealed a cable assy that was exactly the same, but 3" longer in all respects. $18.99 each and will be here Thursday.

Man I can't wait until the roads are dry!

__________________


John D. - St. Louis Park, MN.

1965 El Camino - LT-1, 4L60e, 4wh discs, SC&C susp.
2013 F-150 Platinum - Twin Turbo 3.5

2018 Factory Five MkIV Roadster build thread


Super Poster

Status: Offline
Posts: 596
Date:
Permalink  
 

Do you still have the part numbers for the NAPA brake cables? Do you think they would work on a '72? I've got the caddy brakes on the rear and have the same issue with them applying when you lower the car down. I hate to say it but I spent almost an hour trying to figure out what the heck was going on when I put mine in. Jack it up, adjust brakes, sent it down brakes were locked up, scratch head, repeat. I finally adjusted them loose and added it to my thing's to do list that I've never got back to.

__________________

Steve S. - Fountain, MN


1972 Chevelle - 383 stroked LS1/4L60E - SOLD!


2K+ Club

Status: Offline
Posts: 2791
Date:
Permalink  
 

I don't have the numbers with me, but off the top of my head...

The cables provided with my brake "kit" had dimensions of:
Cable Length (inside to inside of crimped "knobs") = 36"
Sleeve Length (flange to flange where it clips into holes) = 26"

The cables I found at NAPA were about 40" and 30" - or basically 4" longer in all respects, with the same ends on the cable and sleeve.

I don't see why they wouldn't work on a 71/72. When I was helping "Pushrod" last Saturday, the cables supplied with his kit were about the same dimensions as the ones I found. The attachment points/devices are also the same.

I'll keep you posted when I get them, and have 'em installed.

__________________


John D. - St. Louis Park, MN.

1965 El Camino - LT-1, 4L60e, 4wh discs, SC&C susp.
2013 F-150 Platinum - Twin Turbo 3.5

2018 Factory Five MkIV Roadster build thread

«First  <  1 2 3 4 5  >  Last»  | Page of 5  sorted by
 
Quick Reply

Please log in to post quick replies.

Chatbox
Please log in to join the chat!