Discussion Forum - Northstar Chevelle Club

Members Login
Username 
 
Password 
    Remember Me  
Post Info TOPIC: S10 cab swap restoration


Webmaster

Status: Offline
Posts: 158
Date:
S10 cab swap restoration
Permalink  


Hey guys, couple of quick questions to run past you. My DD is a 99 s10, but like all things chevy it is rusting through the floorboards. Drivetrain is sound as can be, same thing with suspension. My buddy also had a 99 S10 but blew the motor up on his. It has been sitting for the last 2 years, and before that he toasted a deer doing 65mph and the frame never looked the same. Otherwise, I would have swapped my drivetrain and been done with it. Somehow his S10 has 0 rust on it. Floorboards, rockers, doors, everything is rust free. I am taking the box and cab off of that frame, and putting it on mine. Couple of problems though.

1. I have cruise, that does not.

2. I have tilt steering wheel, that does not.

3. I have power windows, locks, key fab, that does not. 

My question all relates to the wiring harness. 

1. Cruise, once I mount the cruise actuator on the new cab, it looks like there is a plug for it on the harness, that is just blocked off? 

2. Tilt steering column. I am almost done removing the old one so not an issue.

3. Power options. It doesn't look to bad to swap the power controls, but I'm wondering if I take the power harness (that part that is in the door) is there a plug on the harness somewhere that is capped off or did GM have 2 different wiring harness for power vs non power. Also, anyone know where the receiver is for the keyfab? 

Thanks for the help if anyone knows much about wiring harness! I'm hoping I don't have to swap harness too.


__________________

1965 Elky, 350-200R4

1970 Mercury Colony Park 

1952 Allis Chalmers WD

"It's not about how fast you go, it's about how fast you get going"

~ Steven ~ Stacy, MN


2K+ Club

Status: Offline
Posts: 2444
Date:
Permalink  
 

Sounds interesting and you seem like the guy to make it work. I'm sure its been done before but what will you do with the vin?

__________________

Kevin

Northwestern Ohio


Webmaster

Status: Offline
Posts: 158
Date:
Permalink  
 

dashboard wrote:

Sounds interesting and you seem like the guy to make it work. I'm sure its been done before but what will you do with the vin?


 With the vin I have two options

1. Have the vehicle safety inspected and then not have to register it under a new vin.

2. Do a Bill of sale, transfer his title to me, and register the old one under me. 


__________________

1965 Elky, 350-200R4

1970 Mercury Colony Park 

1952 Allis Chalmers WD

"It's not about how fast you go, it's about how fast you get going"

~ Steven ~ Stacy, MN


Mega Poster

Status: Offline
Posts: 713
Date:
Permalink  
 

Buy his vehicle and register it under your name. Your basically doing a frame/ drive-train swap, no need to complicate it.

Not sure on the wire harnesses but odds are they are two different ones.

__________________

John E - Rogers, MN

Instructions? All I need is the exploded view.
70 El Camino soon to be ls1/t56
64 Malibu SS


1K+ Club

Status: Offline
Posts: 1724
Date:
Permalink  
 

The cruise control I think should swap easy if the other cab has the connector for the module underhood. Swap your tilt column into it so you have the cruise switch which again should be a direct swap. The power locks and windows are not going to be that easy though. Swapping all the door internals and running wires through the doors and kick panels is going to be very time consuming. But I don't think the other body is going to have all the wiring to support those options.


__________________

Chris P
East Central, Mn

66 Chevelle 300 deluxe


Webmaster

Status: Offline
Posts: 158
Date:
Permalink  
 

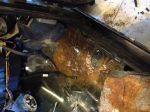
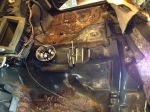
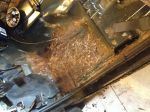
Well the project has gone on. I did end up pulling the dash and wiring harness. I decided that I just couldn't stand living with manual windows. I mean how are you supposed to roll down the passenger window while driving? It ended up being a blessing as I peeled back the carpet and got a good look at the floorboards. Turns out, that what you can't see from the bottom side, is visible from the top. RUST. 

1. Open to recommendations on how to replace them. I could not find any aftermarket floorboards to replace them with so we are on our own. We were going to just cut them out and then throw in a flat piece of sheetmetal and shape to fit, but then we were worried about strength. Does it need dimples added, bracing, something for strength? 

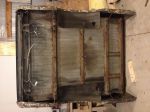
2. Got the bed off last night, and that is very solid, except for some of the cross members. There are some holes and we are looking for good ways to weld them up as well. 

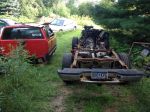
Take a look at the pics. I'll post some pics of my truck and the rust bucket that it is so you guys don't think I'm crazy for doing all this! 


-- Edited by cooz65 on Monday 27th of July 2015 11:40:43 AM

Attachments
__________________

1965 Elky, 350-200R4

1970 Mercury Colony Park 

1952 Allis Chalmers WD

"It's not about how fast you go, it's about how fast you get going"

~ Steven ~ Stacy, MN


2K+ Club

Status: Offline
Posts: 2791
Date:
Permalink  
 

Confused... your buddy's "donor" cab is the one with the rust under the carpet?

__________________


John D. - St. Louis Park, MN.

1965 El Camino - LT-1, 4L60e, 4wh discs, SC&C susp.
2013 F-150 Platinum - Twin Turbo 3.5

2018 Factory Five MkIV Roadster build thread


Webmaster

Status: Offline
Posts: 158
Date:
Permalink  
 

John D wrote:

Confused... your buddy's "donor" cab is the one with the rust under the carpet?


 Yea, from the bottom side, it looked just fine, hadn't gone all the way through yet. As far as we can tell the floorboards are the only signs of rust on the "donor" cab


__________________

1965 Elky, 350-200R4

1970 Mercury Colony Park 

1952 Allis Chalmers WD

"It's not about how fast you go, it's about how fast you get going"

~ Steven ~ Stacy, MN


2K+ Club

Status: Offline
Posts: 2791
Date:
Permalink  
 

gotcha

__________________


John D. - St. Louis Park, MN.

1965 El Camino - LT-1, 4L60e, 4wh discs, SC&C susp.
2013 F-150 Platinum - Twin Turbo 3.5

2018 Factory Five MkIV Roadster build thread


President

Status: Offline
Posts: 7328
Date:
Permalink  
 

OK, the available pans only go to '93, but looking at the pan in your truck, I would say they are close. I would consider buying the 93 pans for $150 and have the basic shape and reinforcing bead rolls to work with. It may take some "tweaking" to get them to fit right, but it seems they would be a lot less work than fabricating from scratch.
GMC Paul's is in Indiana
http://www.mcssl.com/SecureCart/ViewCart.aspx?mid=4B9C21F7-AC33-4308-AFCA-8EB5B6F2683E&sctoken=59dafc956ab74b81a8bd77c3dc5c8e90&bhjs=1&bhqs=1

The crossmembers on the bed can be reinforced with 18 gauge sheet easy enough.


__________________

Mitch D.   River Falls, WI

Lifetime member of the "Cars apart Club"

1966 Chevelle SS 396 M20

1970 Chevelle SS 396 M20

1967 Camaro SS/RS 350 M20


Webmaster

Status: Offline
Posts: 158
Date:
Permalink  
 

Thanks for the link Mitch, I will be looking into that. 

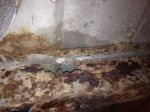
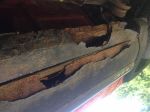
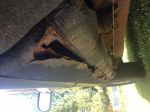
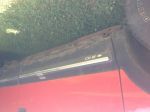
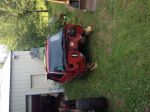
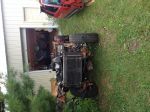
Here are some pictures of my "current" truck and the rust that has taken over. Every bump in the road takes a little bit of my truck with it. The rust has spread all through the doors, 3rd door, rocker panels, bed, tailgate, you name it and there is rust. This is why I'm doing the cab swap. 

Sorry, some of these pics are upside down, the look right on my computer before posting? confused


-- Edited by cooz65 on Monday 27th of July 2015 01:07:18 PM

Attachments
__________________

1965 Elky, 350-200R4

1970 Mercury Colony Park 

1952 Allis Chalmers WD

"It's not about how fast you go, it's about how fast you get going"

~ Steven ~ Stacy, MN


President

Status: Offline
Posts: 7328
Date:
Permalink  
 

I had an 89 S15 plow truck that when the rust got so bad the body mounts fell off while sitting one summer, it went to the great truck round up too.

__________________

Mitch D.   River Falls, WI

Lifetime member of the "Cars apart Club"

1966 Chevelle SS 396 M20

1970 Chevelle SS 396 M20

1967 Camaro SS/RS 350 M20


Webmaster

Status: Offline
Posts: 158
Date:
Permalink  
 

Well the truck is looking pretty sad. I've got it down to just the frame now so I should be half way right? I found even more rust on my red cab that I hadn't found before. It started to turn into a safety issue, as only 4 of the 6 bolts were still attached to the body. It was bad. Before the donor cab and box go back on what are some preventative maintenance things that should be done while I have easy access to it. 

Going to do

Brake lines (looking pretty rusted)

Valve Cover Gaskets

Plugs & wires (lifetime warranty on the wires nana)

Shocks-Front and Rear-Don't know if they've ever been done. Brand recommendations?  

Body Mount Bushings 

Paint- Dad convinced me to throw on new coat of paint. There are some areas on the donor cab and box that need to be repaired. Small minor dents, nothing major. We watched this episode that really kicked off this whole thought (http://powernationtv.com/episode/TT2015-05/ultra-cheap-paint-job) So for under $500 they did primer, primer sealer, base coat, and a clear coat. I talked with Nabpco Paint (local paint shop here in forest lake) and they said I could do a primer, and then a single stage? (where the base and clear is all in one) for $300-400. I'm not looking for the truck to be a show truck, just trying to clean it up, and make it look presentable again. By the way, we have only ever painted small stuff, never a full vehicle, so when the time comes, if anyone who kinda knows what they're doing whats to stop over and lend some tips, we would greatly appreciate that!

Anything Else? This has turned into quite the project. 


-- Edited by cooz65 on Sunday 9th of August 2015 02:53:09 PM

Attachments
__________________

1965 Elky, 350-200R4

1970 Mercury Colony Park 

1952 Allis Chalmers WD

"It's not about how fast you go, it's about how fast you get going"

~ Steven ~ Stacy, MN


President

Status: Offline
Posts: 7328
Date:
Permalink  
 

Amazing how a snow ball turns into an avalanche, eh ????

Use a urethane sealer/primer and then the single stage urethane paint. It will turn out decent. Preparation before the sealer is the key to a successful job that will last. There is a time window with applying the top coat without sanding so read the instructions for both and set aside the time needed to complete the job. If you buy the products from Nabpco, they should be familiar with their product and help you get it right. They may both use the same size tip/needle on a gun and you can get away with just one.

I'll assume you plan to replace the 3 flex hoses along with the steel brake lines.

Look at the gas lines. If they look clean, look closely where they are held by clamps. They tend to rust under the clamps where you can't see the issue.

Body mounts reusable ? Replace if questionable. Same with engine and trans mounts. Now's the time to replace with easy access.

__________________

Mitch D.   River Falls, WI

Lifetime member of the "Cars apart Club"

1966 Chevelle SS 396 M20

1970 Chevelle SS 396 M20

1967 Camaro SS/RS 350 M20


2K+ Club

Status: Offline
Posts: 2745
Date:
Permalink  
 

I would change the fuel lines as well. GM may very well still sell that fuel line kit. I got a set from GM for both supply and return for a 95 Jimmy (same as S10 Blazer) a few years ago. If the brake lines are rusty, fuel lines probably are too.


__________________

Chris - Ramsey, MN.

Dear Optimist, Pessimist, and Realist.

While you guys were busy arguing about the glass of water. I drank it!

Sincerly,

The opportunist.


Webmaster

Status: Offline
Posts: 158
Date:
Permalink  
 

The fuel lines actually look fine.I don't know what kind of line they are compared to the brake, but the fuel lines look new while the brakes look like they've been there for ever. Does anyone have any body part places around here. I'm looking for that floorboard that Mitch had found, but I would like to keep it around here, so if it is way off, and doesn't even come close to fitting I don't have to pay $$$$ for shipping back. I called both Certifit and Keystone but neither place had it. Other auto body places? 


__________________

1965 Elky, 350-200R4

1970 Mercury Colony Park 

1952 Allis Chalmers WD

"It's not about how fast you go, it's about how fast you get going"

~ Steven ~ Stacy, MN


Webmaster

Status: Offline
Posts: 158
Date:
Permalink  
 

Well it has been a while, but things are almost back up and running. Dad and I had to cut out my old floorboards and do some very serious patching before they went into the new truck. Everything is just about back together, and we are getting very close to paint. Which brings me to my question. Before I start hanging plastic, and trying to turn the shop into a paint booth, does anyone have anything set up in their own garage and would be willing to lend a hand for a day to get this thing painted? Otherwise, if not, anyone with experience painting is more than welcome to come on over when we paint and tell us what we are doing wrong. We could use the advice. Thanks guys!

__________________

1965 Elky, 350-200R4

1970 Mercury Colony Park 

1952 Allis Chalmers WD

"It's not about how fast you go, it's about how fast you get going"

~ Steven ~ Stacy, MN


Secretary

Status: Offline
Posts: 2941
Date:
Permalink  
 

cooz65 wrote:

Well it has been a while, but things are almost back up and running. Dad and I had to cut out my old floorboards and do some very serious patching before they went into the new truck....


translation: there's a few less stop and speed limit signs around my area now.... Shutup


__________________

Bryan-NW 'burbs
1972 Malibu
Vaguely stock appearing, and the opposite of restored.
1999 std bore 5.7, Vortec heads, Holley Stealth Ram, GM cam
700R4, Viking coilovers, 12 bolt 4.10 posi, and a whole bunch more


Webmaster

Status: Offline
Posts: 158
Date:
Permalink  
 

Hey guys question for you. What would you say the rear end is worth off of my S10. I just a quick junkyard search and it sounds like they will sell anywhere from $400-$600. I'm pretty sure that it is a 3.73 rear end and I would sell him the brake components as well. The only problem is that if I sell him the rear end, now I'm down two tires, and can't get the rest of it moved to the scrap yard. I let the guy know that and he said that he has a flatbed trailer, would come and pick up the frame, box, and cab and scrap it. If I ask say $250 for the rear end, and he takes the frame, cab, box and scraps it for $125-$150, he's only paying $100 for the rear end plus his time to come and pick it up. If we did this, it would save me the $60 to have to rent a tow dolly, and still trying to figure out how to get the box and cab moved. 

Does this seem like a good deal?

Are there any other parts that I should take off of the scrapped truck before it goes to the junkyard? 

Thanks for the help!


__________________

1965 Elky, 350-200R4

1970 Mercury Colony Park 

1952 Allis Chalmers WD

"It's not about how fast you go, it's about how fast you get going"

~ Steven ~ Stacy, MN


President

Status: Offline
Posts: 7328
Date:
Permalink  
 

At $250, you are both coming out ahead.... scrap prices are way down and I'm thinking he will only get $50-60 bucks, so ...let 'er go.

__________________

Mitch D.   River Falls, WI

Lifetime member of the "Cars apart Club"

1966 Chevelle SS 396 M20

1970 Chevelle SS 396 M20

1967 Camaro SS/RS 350 M20


Mega Poster

Status: Offline
Posts: 713
Date:
Permalink  
 

Don't worry about what the buyer of the rear net cost is when said and done, figure out your hassle factor and is it worth it.

Option A
$250 - Sell the rear, buyer removes scrap for free.

Option B
$250 - Sell the rear
$-60 rent dolly
$+60 scrap
$-25 gas costs to scrapper (rough est) & rental store
$225 total

loss $25  plus time lost (est 5 hours work loading / driving round trip)


-- Edited by Enganeer on Friday 4th of September 2015 11:35:50 AM

__________________

John E - Rogers, MN

Instructions? All I need is the exploded view.
70 El Camino soon to be ls1/t56
64 Malibu SS


2K+ Club

Status: Offline
Posts: 2745
Date:
Permalink  
 

Save the cats off the old truck if you havent done so already. Good money on your pocket to turn them in yourself.


__________________

Chris - Ramsey, MN.

Dear Optimist, Pessimist, and Realist.

While you guys were busy arguing about the glass of water. I drank it!

Sincerly,

The opportunist.


President

Status: Offline
Posts: 7328
Date:
Permalink  
 

Are you driving this yet...headscratch


__________________

Mitch D.   River Falls, WI

Lifetime member of the "Cars apart Club"

1966 Chevelle SS 396 M20

1970 Chevelle SS 396 M20

1967 Camaro SS/RS 350 M20


Webmaster

Status: Offline
Posts: 158
Date:
Permalink  
 

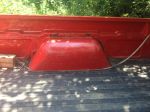
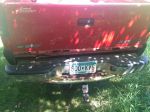
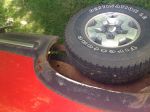
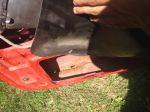
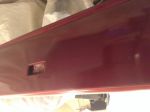
Some of you were asking how the truck project was going, and we made some great progress yesterday. I got to see COLOR! Finally!! We painted the tailgate, the back of the cab, and the front of the box (areas that won't be seen if this didn't go well) Everything went off without a glitch, almost. We got just a couple of small "craters" for lack of better words. They aren't fisheyes. I have read that it is most likely a bubble that popped? You can see the white primer sealer underneath. The summit tech said that this is caused by a solvent bubble, but where would it have come from. We wiped down the truck with "wax and grease" remover a couple times, then wiped it down with a tack cloth, sprayed the primer sealer, waited the recommended time, and then sprayed the basecoat and that's when we noticed these small "craters" any ideas? 


(sorry, not sure why the tailgate is upside-down)


-- Edited by cooz65 on Monday 21st of March 2016 06:35:49 PM

Attachments
__________________

1965 Elky, 350-200R4

1970 Mercury Colony Park 

1952 Allis Chalmers WD

"It's not about how fast you go, it's about how fast you get going"

~ Steven ~ Stacy, MN


1K+ Club

Status: Offline
Posts: 1724
Date:
Permalink  
 

Makes me wonder if it is water in your air lines? Mitch would know better then me though.


__________________

Chris P
East Central, Mn

66 Chevelle 300 deluxe


President

Status: Offline
Posts: 7328
Date:
Permalink  
 

67ss wrote:

Makes me wonder if it is water in your air lines? Mitch would know better then me though.


 Not very familiar with paint issues, but if it was a solvent bubble you may have over coated the primer a bit too soon. If you are using the slow reactor, like we talked about, you want to extend the flash time to the longer limit.


__________________

Mitch D.   River Falls, WI

Lifetime member of the "Cars apart Club"

1966 Chevelle SS 396 M20

1970 Chevelle SS 396 M20

1967 Camaro SS/RS 350 M20


Webmaster

Status: Offline
Posts: 158
Date:
Permalink  
 

I don't think it was water in the lines. We've got a couple of filters running, and we've seen water in the lines before and it doesn't really look like that. I'm leaning more towards the fact of the primer sealer wasn't quite sealed yet. At least I'm hoping.

On that area of the tailgate where this "crater" is, we are going to wet sand it down around that area before applying another coat. Does the rest of the tailgate need to be sanded as well? The summit guy recommended a 1000 grit or finer just to lightly scuff up the area. Is this necessary, or can we apply another coat over what we already laid down.

__________________

1965 Elky, 350-200R4

1970 Mercury Colony Park 

1952 Allis Chalmers WD

"It's not about how fast you go, it's about how fast you get going"

~ Steven ~ Stacy, MN


President

Status: Offline
Posts: 7328
Date:
Permalink  
 

You're beyond a second application time, so scuff it with a scotchbrite pad and shoot.

UNLESS you are just doing a touch up of the spot ?? Then scuff an area around it about 12" and mask the rest off. Try not to get the paint too heavy at the edges and then wet sand to blend. Matching the color is the hard part of spot painting.


__________________

Mitch D.   River Falls, WI

Lifetime member of the "Cars apart Club"

1966 Chevelle SS 396 M20

1970 Chevelle SS 396 M20

1967 Camaro SS/RS 350 M20


Webmaster

Status: Offline
Posts: 158
Date:
Permalink  
 

Well this last weekend we did another round of painting. The cab and box were completed primer sealer through clear coat and it looks great. We let the primer sealer set up longer this time, and we didn't get any defects. This next weekend, the truck will get pushed outside so we can hang the hood, doors, and fenders and paint those. There may be light at the end of the tunnel after all. I've been doing a bunch of reading about wet sanding and buffing your clear coat to get that mirror finish. It just seems wrong to "sand" your new paint Shutup. Northern Tool sells a pretty cheap polishing kit we're looking at getting. http://www.northerntool.com/shop/tools/product_200641816_200641816

ry%3D480ry%3D480ry%3D480ry%3D480


__________________

1965 Elky, 350-200R4

1970 Mercury Colony Park 

1952 Allis Chalmers WD

"It's not about how fast you go, it's about how fast you get going"

~ Steven ~ Stacy, MN


2K+ Club

Status: Offline
Posts: 2791
Date:
Permalink  
 

Looks great! (Now try the same paint system(s) on something 1:25th the size razz)

I feel your pain about taking sandpaper to brand-new paint, but it's just part of the process.

InColor02.jpg


__________________


John D. - St. Louis Park, MN.

1965 El Camino - LT-1, 4L60e, 4wh discs, SC&C susp.
2013 F-150 Platinum - Twin Turbo 3.5

2018 Factory Five MkIV Roadster build thread


Active Member

Status: Offline
Posts: 473
Date:
Permalink  
 

Looks good Steven. Can't wait to see the finished product!


__________________

Chris S.

Oak Grove

'68 Malibu (His)

'68 442 (Hers)


Webmaster

Status: Offline
Posts: 158
Date:
Permalink  
 

Thanks Guys! I would like to do something a little more creative on the tailgate. Take a look at the sketch. Thinking about the Chevy symbol over the handle, and then stenciling on "Chevrolet" and "C16" (C for Coozennoy and '16 for the year it was finished) instead of putting the badges back on. To do that little bit of black, would rattlecan black suffice? Do I need to get a quart of summit racing black to keep the paint in the same family? Don't want to screw something up at this point. Lay Down the basecoat red, then the black, and the clearcoat over everything? Any advice would be great! 

P.S. John, love the color! 


Attachments
__________________

1965 Elky, 350-200R4

1970 Mercury Colony Park 

1952 Allis Chalmers WD

"It's not about how fast you go, it's about how fast you get going"

~ Steven ~ Stacy, MN

Page 1 of 1  sorted by
 
Quick Reply

Please log in to post quick replies.

Chatbox
Please log in to join the chat!