Discussion Forum - Northstar Chevelle Club

Members Login
Username 
 
Password 
    Remember Me  
Post Info TOPIC: LED Tail Light Upgrade for the Vert


3K+ Club

Status: Offline
Posts: 4731
Date:
LED Tail Light Upgrade for the Vert
Permalink  


I bought the rear LED light kit at Car Craft from Easy Performance (Small Michigan private company www.easyperformance.com), and finally got in the right mood to put them in as you have to remove the exhaust tips, rear valance, and rear bumper assembly in order to get to the back of the light buckets.  I guess going to BJ rubbed off on me, and all the car juices started to flow.

So, cranked up the heat in the cave, called the resident low voltage lighting expert in the group (JD), and a short few hours, they were in and shining brightly.  Here's a step through of the process and results:

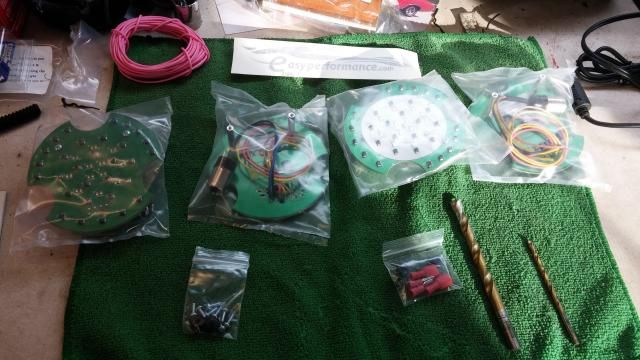
Here's the kit:

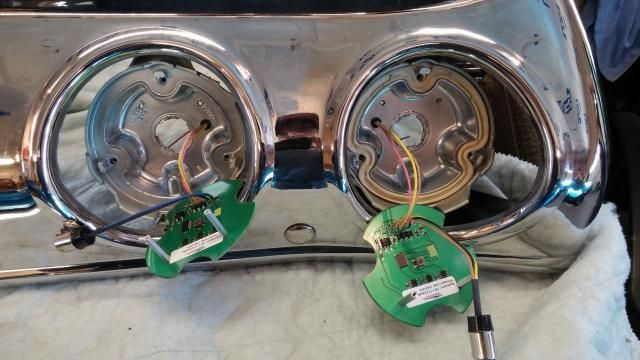
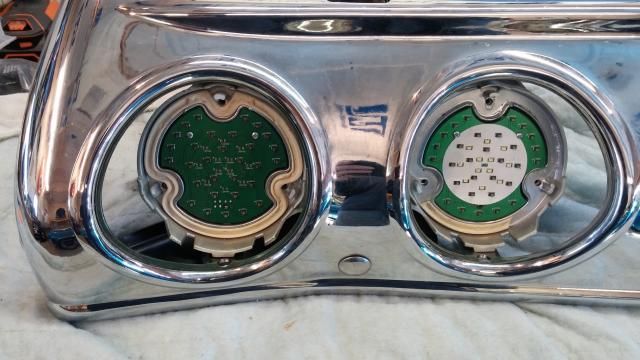
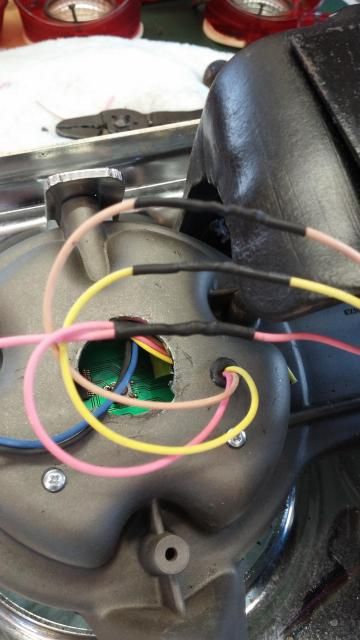
After drilling a hole in each lens bucket and installing the grommets, we had to file the corners of each of the pcb's just a hair to get them to fit, drilled holes for the mounting studs and then ran the wiring through:

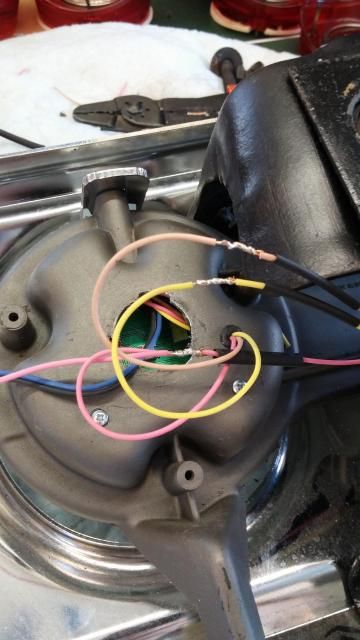
JD's professional wiring:

After connecting a constant +12V (we tapped into the trunk light wire), installing a low current flasher relay, connecting the bulb connectors from the pcb assy's into the bulb sockets, we put the bumper assembly on jack stands and powered everything up.  There are mini programming switches on the backside of the pcb assy's, so we ran through the different lighting sequences, and I landed on a solid on, sequential inboard to outboard sequence.

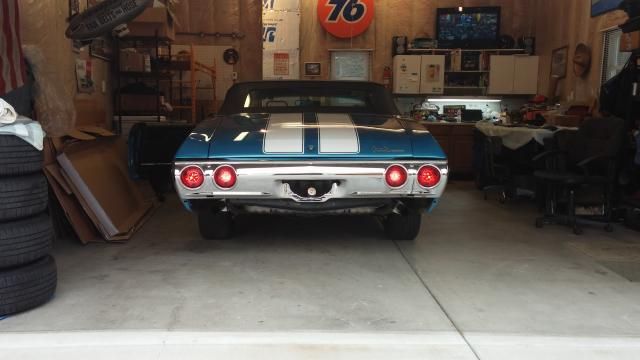
Here's the park lights:

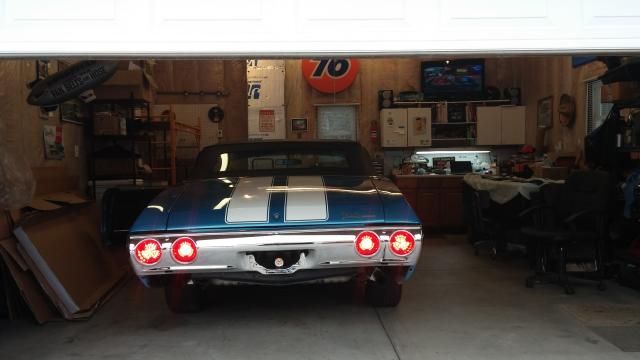
Brake lights on:

Reverse lights:

Here's the hazards and turn signal:

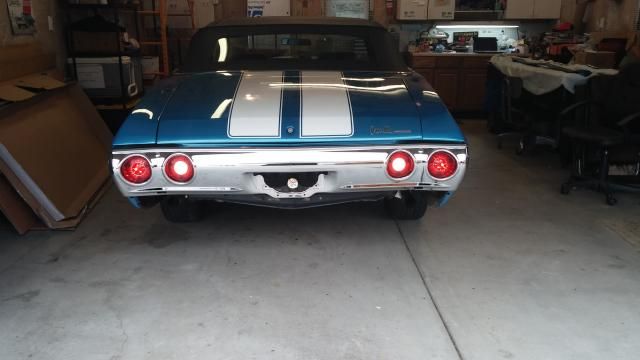
Here's passenger side turn signals with and without park lights:

The lower valance panel is missing, as it's got a couple of chips in it, so I'm going to take it in to Maaco and have them scuff and reshoot it.

I'm pretty happy with the way it makes the inboard 'dummy' reflectors work as additional lights, and will feel safer tooling down the road.


__________________

Stan S.-Twin Cities 'South Metro'

1972 Malibu Convertible 2nd time around 

2001 Mustang GT Convertible 

Forum influenced terms: 'Link Paste', 'Stanitized', & 'Revolving garage door...' 


President

Status: Offline
Posts: 7328
Date:
Permalink  
 

Looks cool. I bought their lights for my '67 Camaro but haven't installed them. I have LED's on the car now, but they aren't programmable to be sequential.

He is supposed to be working on conversions for the '66. At the time I spoke with him, he had just acquired the extension housings to begin the process.

__________________

Mitch D.   River Falls, WI

Lifetime member of the "Cars apart Club"

1966 Chevelle SS 396 M20

1970 Chevelle SS 396 M20

1967 Camaro SS/RS 350 M20


3K+ Club

Status: Offline
Posts: 4731
Date:
Permalink  
 

Lost in the 60s wrote:

Looks cool. I bought their lights for my '67 Camaro but haven't installed them. I have LED's on the car now, but they aren't programmable to be sequential.

He is supposed to be working on conversions for the '66. At the time I spoke with him, he had just acquired the extension housings to begin the process.


Thanks Mitch. 

I realized 2 of the video's weren't published, so hopefully they work now.


__________________

Stan S.-Twin Cities 'South Metro'

1972 Malibu Convertible 2nd time around 

2001 Mustang GT Convertible 

Forum influenced terms: 'Link Paste', 'Stanitized', & 'Revolving garage door...' 


1K+ Club

Status: Offline
Posts: 1260
Date:
Permalink  
 

Cool!

__________________


'69 Convertible,  Lemans Blue, 454, 200 4R, 12 Bolt. 

Jon H.  Lino Lakes


Vice President

Status: Offline
Posts: 234
Date:
Permalink  
 

The new tail lights look very nice, Stan. In addition to the brightness of LEDs, the sequential feature will improve visibility of your car for those behind you who are too busy with phoning, texting, reading, eating, applying makeup, shaving, etc.

__________________

Ron - Twin Cities

'66 Malibu


2K+ Club

Status: Offline
Posts: 2791
Date:
Permalink  
 

They've got a few bugs to work out - none of them really hardware/product related - but a few that would have some that are electrically challenged on the phone.

- The install manual is a bit confusing.

- A few more inches of wire on the modules would be nice.

- The PCB's for this kit DO require a bit of filing/sanding to fit in the OEM housings.

- The "mode selector" switch/button (at least on this kit) should be moved to the front/LED face of the PCB. (unless you remove the OEM lens and pull 2 screws mounting screws from each of the 4 boards you can't change the mode of operation). Moving the button to the face of the board would make the job easier.

- Each PCB (printed circuit board) needs to be "adjusted/set" to the same mode as its sister. There are 5+ choices of flash/sequence/lighting... and EACH board needs to be set to the same choice. Once set to the same choice, the respective sides will synch with eachother, and produce the desired pattern. This was not defined in the manual.

- This particular kit (in the instructions) states that you do not connect the attached bulb adapters to the OEM sockets when using the "inboard/backup light" LED modules. We did this, and they didn't work. Error in the manual... (A quick brain-flash revealed that if you don't connect the bulb adapters, the circuit on the LED module CANNOT achieve a ground circuit (plastic housing) and it will never work. We plugged it in and all is well.)

- It helps to know the car you're installing them in. The processors on the boards also require constant +12V to operate. The modules come with "bulb socket adapters" that plug into the existing OEM sockets (to get the turn/stop/taillight feeds), but you also have to supply a fused, constant, +12V source to them as well. The manual suggests running a fused supply wire through the car to either the fusebox or the battery (don't remember which). In Stan's case, his rear light harness in the trunk had an un-used pigtail/socket for a trunk lamp. We tapped into this OEM wire (already hot & fused at the panel) for the +12V, and added another fuse-holder at the tap just for the LED lights... Saved us a bunch of time running a wire through the car.

I am in no way knocking this product.

The quality of materials, operation, and results are absolutely top-notch. They just need to refine the instructions, do a few tweaks, and adapt the product a bit.

__________________


John D. - St. Louis Park, MN.

1965 El Camino - LT-1, 4L60e, 4wh discs, SC&C susp.
2013 F-150 Platinum - Twin Turbo 3.5

2018 Factory Five MkIV Roadster build thread


Active Member

Status: Offline
Posts: 473
Date:
Permalink  
 

The taillights look great Stan!  You can't beat LED for brightness.  The sequential feature looks great and really catches your eye.

Nice work John!


__________________

Chris S.

Oak Grove

'68 Malibu (His)

'68 442 (Hers)


Vice President

Status: Offline
Posts: 234
Date:
Permalink  
 

Stan and John -- Some kits have the LEDs on a board like yours and are advertised as essentially "plug 'n' play." Why is the installation for this kit more complex?

__________________

Ron - Twin Cities

'66 Malibu


2K+ Club

Status: Offline
Posts: 2791
Date:
Permalink  
 

This kit requires a constant +12V supply to the boards. This is not part of the OEM tail/stop circuits.

__________________


John D. - St. Louis Park, MN.

1965 El Camino - LT-1, 4L60e, 4wh discs, SC&C susp.
2013 F-150 Platinum - Twin Turbo 3.5

2018 Factory Five MkIV Roadster build thread


Super Poster

Status: Offline
Posts: 663
Date:
Permalink  
 

Looks great! Nice work as always.

__________________

Scott Parkhurst

Belle Plaine


Horsepower Junkie

Page 1 of 1  sorted by
 
Quick Reply

Please log in to post quick replies.

Chatbox
Please log in to join the chat!