Discussion Forum - Northstar Chevelle Club

Members Login
Username 
 
Password 
    Remember Me  
Post Info TOPIC: First Day (1) of my Final Chevelle Assembly


Active Member

Status: Offline
Posts: 483
Date:
First Day (1) of my Final Chevelle Assembly
Permalink  


Got a lot done today....Still have a lot to do.


Got the trans mated to the engine.  Installed the cross member and the new trans mounts.  Had to drill two new holes since this is a 700 R4 and I have a TH350.  It was close though.


photo photo3.jpg

Cleaned up the firewall holes getting ready for the Vintage AC. Should get to that tomorrow.

photo photo2.jpg

Installed the new front springs. These are lowering springs in the front to give it a little rake. A whole lot easier to install springs when the engine is installed!! Installed the new shocks, and tie rods. Replaced the nuts, and cotter pins.

photo photo4.jpg photo photo.jpg

On the drivers side I still have to purchase the other tie rod. The original ones were just worn out.

photo photo6.jpg

Installed the new power steering pump and coupler. I have some work on the inside to do but will mount the steering wheel shortly so I can line it up. I need to research on how to align the steering box to the linkage tonight.

photo photo5.jpg photo photo7.jpg

And finally will be calling the drive line shop tomorrow morning to ask them how they want me to measure my drive shaft. I have to have it shortened because the 700R4 is longer than the TH350. Not by a whole lot though.
photo photo8.jpg photo photo1.jpg

Tomorrow tasks and I will update with pics.
1. Measure driveshaft
2. Take drive shaft to the shop
3. Pick up new tie rod end on the way home
4. Install the new tie rod
5. Install A/C bracket to mount the compressor
6. Install the cooler/dryer
7. Install the A/C box and route the hoses

Still have lots more!!


__________________

'Gear Lube' 
emoticon-tv-002.gif


President

Status: Offline
Posts: 7328
Date:
Permalink  
 

Good to see you're back at it. The A/C may take a bit longer than you anticipate. I'm installing one on my '38 and there's a LOT that goes into it.


__________________

Mitch D.   River Falls, WI

Lifetime member of the "Cars apart Club"

1966 Chevelle SS 396 M20

1970 Chevelle SS 396 M20

1967 Camaro SS/RS 350 M20


Active Member

Status: Offline
Posts: 483
Date:
Permalink  
 

Totally agree. Got everything laced out and watched some videos. Remember I am the Internet mechanic!!

__________________

'Gear Lube' 
emoticon-tv-002.gif


2K+ Club

Status: Offline
Posts: 2444
Date:
Permalink  
 

When are we going to fire that bad boy up?

__________________

Kevin

Northwestern Ohio


3K+ Club

Status: Offline
Posts: 4731
Date:
Permalink  
 

dashboard wrote:

When are we going to fire that bad boy up?


 yeahthat

You know you don't have to have the drive shaft connected to start her up!  nana


__________________

Stan S.-Twin Cities 'South Metro'

1972 Malibu Convertible 2nd time around 

2001 Mustang GT Convertible 

Forum influenced terms: 'Link Paste', 'Stanitized', & 'Revolving garage door...' 


Active Member

Status: Offline
Posts: 483
Date:
Permalink  
 

nanananaHa ha...Good to get advice from my elders!! Much much olders elders


__________________

'Gear Lube' 
emoticon-tv-002.gif


2K+ Club

Status: Offline
Posts: 2444
Date:
Permalink  
 

Tom your right, Stan’s age is really starting to show. He was really struggling to keep up at the swap meet Sunday, I actually had to carry some of the parts he bought as well as my own. I think he’s becoming one of the ‘short range’ car hobbyist, you know park the car get the lawn chair out of the trunk and sit in the shade.

boring


__________________

Kevin

Northwestern Ohio


Active Member

Status: Offline
Posts: 483
Date:
Permalink  
 

Kevin...lololololol....you should have brought the cane.

Dr. Tim. I had an overdrive custom done by Master Trans in Rosemount. They did a beefy 700R4. Took the drive shaft to Proven Force today. Had to switch yokes too since the old one was off the th-400. No dash button. I got a shifter kit from Bowtie that converts my horse shoe from a 3 speed to 4.

I will post some picks tomorrow. Kind of tired after the long day.

1. Finished routing the A/C hoses through the fender.
2. Mounted the power sterring box.
3. Mounted the A/C control box on the firewall. Wow what he'll that was. Those hoses have NO GIVE!
4. Mounted the hose plates and sealed them on the side wall.
5. Mounted dash back together.
6. Installed front wheels.

Doesn't feel like I got a lot done, but the big stuff on the A/C is done. I just couldn't beleive how hard it was to work those hoses around those angles through the fender. Then mounting the box you had 1/8" to play with while fighting the hoses. With cuts and a lot of swearing I got it.

Tomorrow I will finish the dash inside and start wiring inside for gauges, mount the A/C control panel, install the ordered tie rod end, then steering shaft etc. hope to get to the A/C cooler and dryer up front and start wiring. Wednesday will be the exhaust and then wiring the A/C in the engine compartment. Thursday will be saved for getting in the seat, center console shifter linkage etc. was hoping to be able to drive it by the weekend. At this point I don't see it but maybe....will post pics tomorrow.


-- Edited by gearlube on Monday 6th of May 2013 08:42:52 PM


-- Edited by gearlube on Monday 6th of May 2013 08:44:06 PM

__________________

'Gear Lube' 
emoticon-tv-002.gif


2K+ Club

Status: Offline
Posts: 2444
Date:
Permalink  
 

Tom, here’s the gauge kit I mentioned Saturday but I like your post install idea also. Your car is coming along nicely

http://www.summitracing.com/parts/sum-800104k


-- Edited by dashboard on Monday 6th of May 2013 10:18:35 PM

Attachments
__________________

Kevin

Northwestern Ohio


Mega Poster

Status: Offline
Posts: 718
Date:
Permalink  
 

Looks good Tom. Did you buy the tranny, have one rebuilt? Do you have to put the switch in the dash for the overdrive or how is that being handled?

__________________


3K+ Club

Status: Offline
Posts: 4731
Date:
Permalink  
 

O.k. Tom, it's Day 5, what's the scoop?  How's it going?


__________________

Stan S.-Twin Cities 'South Metro'

1972 Malibu Convertible 2nd time around 

2001 Mustang GT Convertible 

Forum influenced terms: 'Link Paste', 'Stanitized', & 'Revolving garage door...' 


Active Member

Status: Offline
Posts: 483
Date:
Permalink  
 

Will have a full write up tomorrow. Ran into some issues. But it's now sorted...

__________________

'Gear Lube' 
emoticon-tv-002.gif


3K+ Club

Status: Offline
Posts: 4731
Date:
Permalink  
 

gearlube wrote:

Will have a full write up tomorrow. Ran into some issues. But it's now sorted...


Well...?   dunno


__________________

Stan S.-Twin Cities 'South Metro'

1972 Malibu Convertible 2nd time around 

2001 Mustang GT Convertible 

Forum influenced terms: 'Link Paste', 'Stanitized', & 'Revolving garage door...' 


Active Member

Status: Offline
Posts: 483
Date:
Permalink  
 

There was no way the he had Vintage Air and it was easy. He must have Classic Auto air, and that one was straight through the firewall. There have been numerous complaints on the web about this. I had the fender off so the block off was easy. The pain here was that 90 degree angle with stiff hoses. I agree the bolts we had to line up was hard too, but it was fighting the hoses....

Honestly If I would do it again I would not go with Vintage Air because of it...I am quite nervous because if there is a leak I would have to remove the box and all the hoses.  There is no easy way to get to them...Imgonna


-- Edited by gearlube on Monday 13th of May 2013 01:04:04 PM

__________________

'Gear Lube' 
emoticon-tv-002.gif


3K+ Club

Status: Offline
Posts: 4731
Date:
Permalink  
 

Craig's is Vintage Air.  He went with a full serpentine belt system (March pulleys I think?) and their components.

Now that I look at the firewall where the 4 hoses come through on yours Tom, that's the area that the Classic Auto Air kit blocks off with a plastic cover plate, and their hoses all come through the heater core block off plate.  Much easier that way.  I did it all by myself, and didn't need any help getting the hoses through.

Bottom line is your are done, and I'm sure it will work fine.


-- Edited by SShink on Monday 13th of May 2013 01:50:56 PM

__________________

Stan S.-Twin Cities 'South Metro'

1972 Malibu Convertible 2nd time around 

2001 Mustang GT Convertible 

Forum influenced terms: 'Link Paste', 'Stanitized', & 'Revolving garage door...' 


Active Member

Status: Offline
Posts: 483
Date:
Permalink  
 

I think I had a productive week.  I will be hitting it again tonight.  But I ran into lots of issues and had to fabricate and figure some things out.  Not cookie cutter.  My list is getting smaller though!  I am going to get everything done, and then leave all the electrical and wiring routing for last.


I installed the starter I got from the race shop. Its a high torque mini starter. However it is a Chinese item and when I fit it, the lip was too close to the fly wheel. So I had to grind all the down to give a comfortable clearance. Again a job that should have been 10 minutes ends up being 1 hour.
photo null-9.jpg

Installed my headers.
photo null-10.jpg

I finished up the major a/c pieces. I won't even tell you the nightmare the a/c box was trying to get into place and fight all the stiff rubber hoses going at a 90 degree angle. Have the cuts and bruises to prove it.
photo null-19.jpg
photo null-20.jpg
photo null-12.jpg
photo null-13.jpg
photo null-14.jpg
photo null-11.jpg
photo null.jpg

I got the compressor brackets mounted along with the compressor. Still need the belt. It too had to be modified with different bolts to fit my front end accessory kit.
photo null-1.jpg
photo null-15.jpg

Finished the interior A/C hose routing and installed the command module. Again still need to do all the wiring and some minor cosmetics. I also installed a large center speaker. Had to make a bracket for it as the stock one would not work. Routing all those hoses was a lot of fun in limited space.
photo null-6.jpg
photo null-4.jpg
photo null-5.jpg
photo null-7.jpg
photo null-21.jpg
photo null-22.jpg
photo null-23.jpg
photo null-3.jpg

Picked up my newly shortened drive shaft. Had to shorten it 3 1/8th inches. Had to install a new yolk. They are amazingly fast at Proven Force.
photo null-8.jpg

Tonight I will be working on the hoses and getting them connected. Thanks to Kevin "Dashboard" for the suggestion on lengthening the a/C hose. I called Vintage Air and they gave me a local place. Went over to Pyrteck and got a joiner and some a/c hose to lengthen my refrigeration hose to route in front of the engine instead of over it. Just looks cleaner. Will be crimping hoses tonight. Install the radiator and hoses etc. still have long list, but it is getting shorter! Goal is to have it moving by Memorial day..But I keep running into those 10 minute jobs turning into 1-2 hours!!


__________________

'Gear Lube' 
emoticon-tv-002.gif


Super Poster

Status: Offline
Posts: 596
Date:
Permalink  
 

Glad I'm not the only one who fought with the Vintage air hoses angry
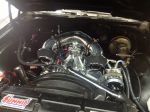
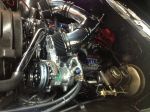
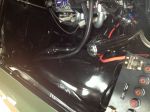
.  Worst part of the whole install.  Four stiff hoses passing through 2 tight fitting plates with a 90 degree bend in the middle, then you have 2"inches of clearance to get them connected to under dash box.  I had my fenders off and dash out and still fought with it.  Good news is everything else is fairly easy and their GenIV system cools really well, you're going to be happy with it.


__________________

Steve S. - Fountain, MN


1972 Chevelle - 383 stroked LS1/4L60E - SOLD!


Active Member

Status: Offline
Posts: 483
Date:
Permalink  
 

Steve you warned me about it and you were right. It took 2 hours to get it right. Drop it down, pull on the hose 1/2 inch. Rinse and repeat. I heard the Auto Classic Air it much better for their hose routing through the firewall. I agree the rest of the kit is pretty easy. The condenser, dryer etc was easy. I am looking forward to the A/C and Heat/defrost!! So it will be worth it. I was happy that the A/C box was pretty light, so handling it was good.

__________________

'Gear Lube' 
emoticon-tv-002.gif


2K+ Club

Status: Offline
Posts: 2745
Date:
Permalink  
 

Myself and John D helped Pushrod Craig run those hoses and that was actually the easy part. Not because there was 3 of us, a single person could have done it. Actually, the hardest part was getting the complete under dash assembly in place and getting the bolts started. The one thing that made it a little easier was that Craig had the windshield out so we could reach, stand through the opening, position ourselves anywhere we needed, and communicate to help support it. Took 2 inside to hold it and one at the firewall feeding the hardware through. PITA.


__________________

Chris - Ramsey, MN.

Dear Optimist, Pessimist, and Realist.

While you guys were busy arguing about the glass of water. I drank it!

Sincerly,

The opportunist.


3K+ Club

Status: Offline
Posts: 4731
Date:
Permalink  
 

Lookin' good Tom!  thumbsup

Hang in there, I'm like you and have figured out it's better to estimate the time required then increase it 2-3X based on running into part fit issues, multiple trips to the hardware store and auto parts stores, re-ordering parts that were missed, etc...  I can't wait to get mine back to start working on it, but I'm sure I'll run into un-anticipated issues too that I've missed on the checklist.

I'm sure the Vintage air will work out great, but I do have to say from looking at the pictures the Classic Auto Air system I installed in a '72 Chevelle a few years ago was much easier passing through the firewall and under the dash.  The worst thing I remember on that system was installing the air intake block off plate inside the passenger fender while the inner fender was still on.  Everything else was pretty straightforward.

I can't wait to hear it and go for a ride on Memorial Day! 


__________________

Stan S.-Twin Cities 'South Metro'

1972 Malibu Convertible 2nd time around 

2001 Mustang GT Convertible 

Forum influenced terms: 'Link Paste', 'Stanitized', & 'Revolving garage door...' 


2K+ Club

Status: Offline
Posts: 2444
Date:
Permalink  
 

Chris R wrote:

Myself and John D helped Pushrod Craig run those hoses and that was actually the easy part. Not because there was 3 of us, a single person could have done it. Actually, the hardest part was getting the complete under dash assembly in place and getting the bolts started. The one thing that made it a little easier was that Craig had the windshield out so we could reach, stand through the opening, position ourselves anywhere we needed, and communicate to help support it. Took 2 inside to hold it and one at the firewall feeding the hardware through. PITA.


Chris, was Craig’s Vintage or Classic Air?


__________________

Kevin

Northwestern Ohio


Active Member

Status: Offline
Posts: 483
Date:
Permalink  
 

Then they had much better luck than Steve and I. Plus it helps that those are already A/C guys!!

__________________

'Gear Lube' 
emoticon-tv-002.gif


President

Status: Offline
Posts: 7328
Date:
Permalink  
 

It's too late now, but Dealers Automotive in Hopkins is a Vintage Air dealer/installer/repair facility and they have 90° fittings to make that bend instead of the hose. It involves a few more cuts and crimps but no fighting to bend a thick hose.

Vintage also has a preformed 90° hose for the heater...thumbsup


__________________

Mitch D.   River Falls, WI

Lifetime member of the "Cars apart Club"

1966 Chevelle SS 396 M20

1970 Chevelle SS 396 M20

1967 Camaro SS/RS 350 M20


Mega Poster

Status: Offline
Posts: 718
Date:
Permalink  
 

Looks good Tom. I guess I'm glad I sold my Vintage Air.

__________________


2K+ Club

Status: Offline
Posts: 2745
Date:
Permalink  
 

Yes its Vintage Air and there are tricks you can do to make things easier, like feeding hoses through the 4 hole eyelet in the firewall, lubrication is your friend in this case. Also, you dont install and crimp on the fittings before hand, they wont fit through the eyelets anyways. You mock up the length of hoses first and install the hoses through 4 hole bracket/grommet thing on the bench and then bring it to the car to put it in place, actually, we did it right on the floor of the car since there was no seats installed in his car at the time. Craigs car is a non AC car so the hoses went through the kick panel on the passenger side. We also connected the hoses to the assembly under the dash first, then lifted it up and then bolted it in place. He also had the inner fenders out of the car as well.


__________________

Chris - Ramsey, MN.

Dear Optimist, Pessimist, and Realist.

While you guys were busy arguing about the glass of water. I drank it!

Sincerly,

The opportunist.


Active Member

Status: Offline
Posts: 483
Date:
Permalink  
 

Thanks Chris, hopefully that will be good advice for others now that I am far down that road. On to the next fun!!

__________________

'Gear Lube' 
emoticon-tv-002.gif


1K+ Club

Status: Offline
Posts: 1724
Date:
Permalink  
 

What did you have to do to get your wiring all straightened out?


-- Edited by 67ss on Monday 15th of July 2013 03:35:20 PM

__________________

Chris P
East Central, Mn

66 Chevelle 300 deluxe


Active Member

Status: Offline
Posts: 483
Date:
Permalink  
 

Took the Chevelle out for a drive last night!! nana  Things went really well.  No more leaks!!  Shifts nice.  The 3.90 gears are really aggressive and 1st gear is gone in a few seconds.  I have to install the rear tail pipe ends, LED tail lights, and some minor pieces.  New rims are coming this week and will install the suspension too.  Taking it to Goodyear for A/C charge, alignment and to fix a minor thing.

Last night I did a 3 step wet sand process starting with 1500 grit, then 2000, then 3000 grit.  Pics below.  Will be buffing out the paint tonight.  Then tomorrow starting on the detail work in the engine compartment.  But at least it is running and I have to say it is the quickest car I have ever driven.  Will snap your neck and I didn't even hop on it, but for what I did, its all there.  Not going to make it to Car Craft with it.  Not enough miles on it and also I don't want to send anything un-finished.  I have a vision for this thing and I am getting close.

photo8.JPG

photo5.JPG

photo3.JPG

photo7.JPGphoto8.JPG

photo2.JPG

photo (7).JPG


Attachments
__________________

'Gear Lube' 
emoticon-tv-002.gif


2K+ Club

Status: Offline
Posts: 2791
Date:
Permalink  
 

Looking Good!!

(WTH?? You've got 4 days - get busy! You can get it to Car Craft! You know you want to....)

__________________


John D. - St. Louis Park, MN.

1965 El Camino - LT-1, 4L60e, 4wh discs, SC&C susp.
2013 F-150 Platinum - Twin Turbo 3.5

2018 Factory Five MkIV Roadster build thread


President

Status: Offline
Posts: 7328
Date:
Permalink  
 

Don't get an alignment until you have the new wheels/tires on it....hyper

Different sidewall height will change the specs....

Everything else looks good and there are PLENTY of un-finished cars at CC. I know that may not be your value but don't let it stop you from attending.  Your car is already way nicer than many that will be there...thumbsup


__________________

Mitch D.   River Falls, WI

Lifetime member of the "Cars apart Club"

1966 Chevelle SS 396 M20

1970 Chevelle SS 396 M20

1967 Camaro SS/RS 350 M20


3K+ Club

Status: Offline
Posts: 4731
Date:
Permalink  
 

You can get it to CC!  Just install the tail lights, and you should be able to drive it on the street (or leave the old ones in for now).  Get out and drive it another 25-30 miles, and you will be good to go.

3 years ago I was wrenching on the green '72 and replacing the power steering pump I picked up from Karl until 10 p.m. the night before CC, and left at 7 a.m. the next morning with less than 2 miles on an engine and trans swap and made it without any issues!  hyper

My last piece of free advice, don't hammer on it too much yet... that trans is new so the parts need to get happy with each other, and I'd get at least 500 miles on it before banging it too hard.  2cents


__________________

Stan S.-Twin Cities 'South Metro'

1972 Malibu Convertible 2nd time around 

2001 Mustang GT Convertible 

Forum influenced terms: 'Link Paste', 'Stanitized', & 'Revolving garage door...' 


Active Member

Status: Offline
Posts: 483
Date:
Permalink  
 

Chris I basically unwired everything and re-did it based on advice from the guys and the net.

I guess I have a weird quirk in that if I am going to a show to show off my car, I want it complete. So I am going to target a different show. But I plan on helping out at the show and hanging out...

__________________

'Gear Lube' 
emoticon-tv-002.gif


Secretary

Status: Offline
Posts: 2941
Date:
Permalink  
 

gearlube wrote:

Chris I basically unwired everything and re-did it based on advice from the guys and the net.

I guess I have a weird quirk in that if I am going to a show to show off my car, I want it complete. So I am going to target a different show. But I plan on helping out at the show and hanging out...


 I know the perfect show:

http://northstarchevelles.activeboard.com/t53011189/automania-2013-august-11th-10am/


__________________

Bryan-NW 'burbs
1972 Malibu
Vaguely stock appearing, and the opposite of restored.
1999 std bore 5.7, Vortec heads, Holley Stealth Ram, GM cam
700R4, Viking coilovers, 12 bolt 4.10 posi, and a whole bunch more


Active Member

Status: Offline
Posts: 483
Date:
Permalink  
 

Exactly!! I heard its the best show in MN!!!! Seriously I am looking forward to it.

__________________

'Gear Lube' 
emoticon-tv-002.gif


President

Status: Offline
Posts: 7328
Date:
Permalink  
 

bowtie wrote:
gearlube wrote:

Chris I basically unwired everything and re-did it based on advice from the guys and the net.

I guess I have a weird quirk in that if I am going to a show to show off my car, I want it complete. So I am going to target a different show. But I plan on helping out at the show and hanging out...


 I know the perfect show:

http://northstarchevelles.activeboard.com/t53011189/automania-2013-august-11th-10am/


 The Camaro Club has a show on August 17th at Belzer too.


__________________

Mitch D.   River Falls, WI

Lifetime member of the "Cars apart Club"

1966 Chevelle SS 396 M20

1970 Chevelle SS 396 M20

1967 Camaro SS/RS 350 M20


Active Member

Status: Offline
Posts: 483
Date:
Permalink  
 

I finished the exterior which consisted of a 3 step wet sanding from 1200,1500,3000 grit to buffer cutting, polishing and sealing.  I will wax it tomorrow after the sealant sets in.  I thought it came out pretty well considering the paint job is kind of crappy but it will save me from having to paint for a while....

photo3.JPG

photo4.JPG

photo1.JPG

photo5.JPG

photo6.JPG

photo7.JPG


Then I hit the engine compartment detailing.  Got my summit parts today etc.  Pics are kind of crappy but you get the idea.  I am going for an industrial look.  Stainless, black and chrome.


photoD.JPG

photoC.JPG

photoA.JPG

photoB.JPG


My rims should be coming soon.  I still have quite the list to complete, but at least I can see the end to where I am satisfied for the time being to show it.  Still have to get the A/C charged and an alignment after I put in the new suspension and wheels.  Have interior things to finish, stereo etc.  Inside is still a pit....But honestly I am enjoying it again.  But still high on paint fumes...nana


Attachments
__________________

'Gear Lube' 
emoticon-tv-002.gif


Active Member

Status: Offline
Posts: 444
Date:
Permalink  
 

Looks great!  Nice work!


__________________

Loren B. - Princeton, MN

1969 Chevelle SS Convertible, Bright Torch Red, 396, 200-4R, 12 bolt 3.73 Posi

1969 Chevrolet C20, Orange/White, 350, 4-spd, 4.11

1980 Camaro, RS, Impulse Blue, 350, 200-4R, 3.73 Posi

1967 Chevelle Malibu 2-DR Hardtop.  In process


Super Poster

Status: Offline
Posts: 663
Date:
Permalink  
 

That looks great!

__________________

Scott Parkhurst

Belle Plaine


Horsepower Junkie


2K+ Club

Status: Offline
Posts: 2444
Date:
Permalink  
 

Very nice Tom, looking forward to seeing it in the sunlight. So did you rewire from the firewall forward? How do you like the post gauges?

__________________

Kevin

Northwestern Ohio

Page 1 of 1  sorted by
 
Quick Reply

Please log in to post quick replies.

Chatbox
Please log in to join the chat!